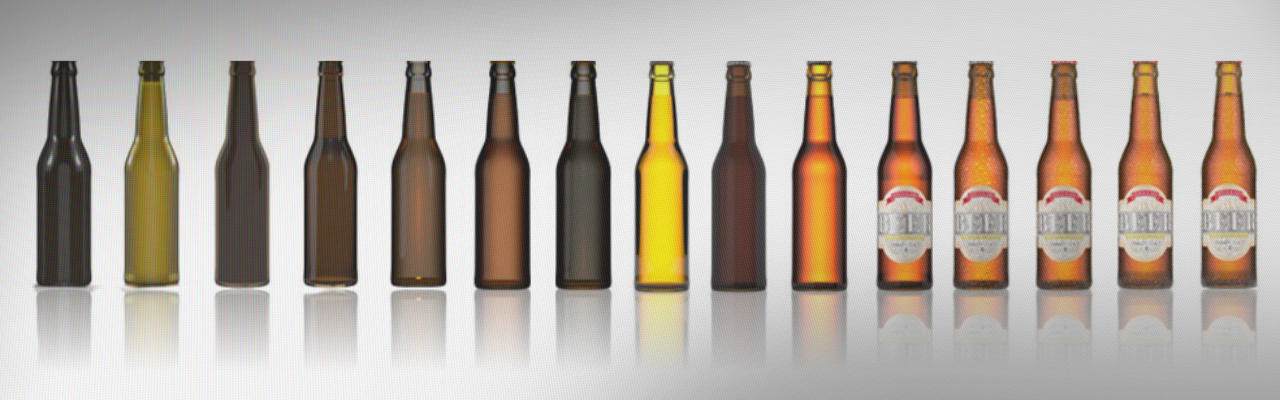
Summer vacation are almost over and final year in Helsinki Metropolia University of Applied Sciences starts at next week. This was my last training project with Modo in this vacation and what could be better topic than "Beer bottle" at the end 🙂 So check out what problems I have and what solutions I found for those.
Chec out full resolution ad from portfolio.
This is my third Modo training work. I started to learn modo about one month ago. I have made those "Escape" and "Silkkinen Shampoo" before this one. In every of these different works I have tried to find always something new area from Modo to learn and I think I've succeeded very well. So, I have learned so much about Modo in these exercises and there is still much to learn so lets gets started!
I chose this "product image" theme, because I always have wondered how those nice product shots have been made. They always look so delicious, fresh and nice. I spent many hour for just reading Modo's forums and by watching tutorials. It wasn't easy to find good tutorials for this kind job and so some solutions is just my own findings.
I had one decision at the beginning of this work. I try to achieve final image mostly in Modo and some CC in Photoshop if needed. But all passes and compositing that usually belong these kind product shots I left off from this work. That's because I think it is good way to learn some new techniques from new program when you have to try achieve some tricks inside of that program than fake it some other program that you already know. And many times 3D artist make only that 3D part and give it to the next level like graphical designer.
Learning objectives
- Modo workflow
- Luminous Mesh and how to use them with lightning
- Lightning setups and reflection planes
- Understand materials and how to use them properly
- HDR images in modo
- Rendering settings
Breakdown Beer Bottle
Always find good reference images
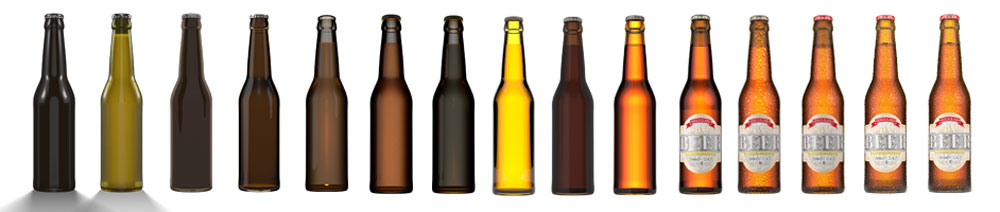
It's always best to search good reference images before you start to do any modeling. You can find tons of images just with google image search and usually there is couple good reference for your work. I try to just find some beer bottles for the modeling process.
There is also other image services that provide very good reference if google isn't enough:
http://www.gettyimages.com
http://www.istockphoto.com
http://www.sxc.hu
http://www.stockvault.net
http://www.dreamstime.com
http://www.imageafter.com
http://www.freedigitalphotos.net
http://www.flickr.com
Some of those are commercial, but remember that you do not need to use image in your work otherwise than just pick the idea, expand the imagination and see how it all looks in real world.
Modeling the bottle
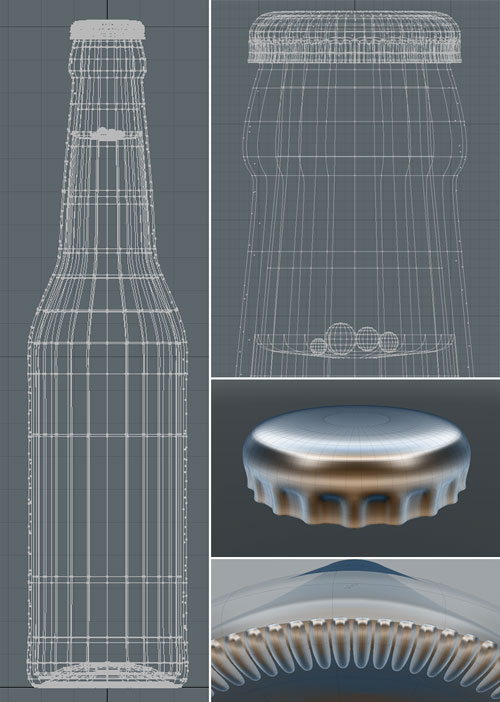
Model the bottle is quite simple task. Bottle itself is circular object that you can model with many techniques. I started from basic primitive object cylinder and just added some loops and scaling them. Here is best to use some reference images to get shape correct. Bottle cap could be hardest part in this modeling section if there is some, but that is quite easy also. There is good tutorial about modeling bottle cap with modo.
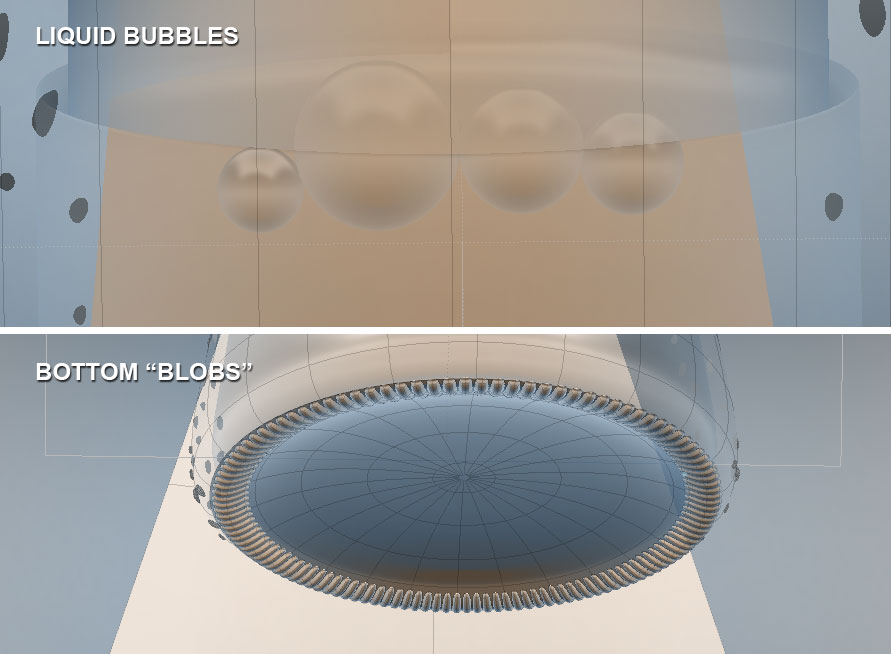
I also made some small details with modeling. I made those bottom "blobs" and liquid bubbles with modeling.
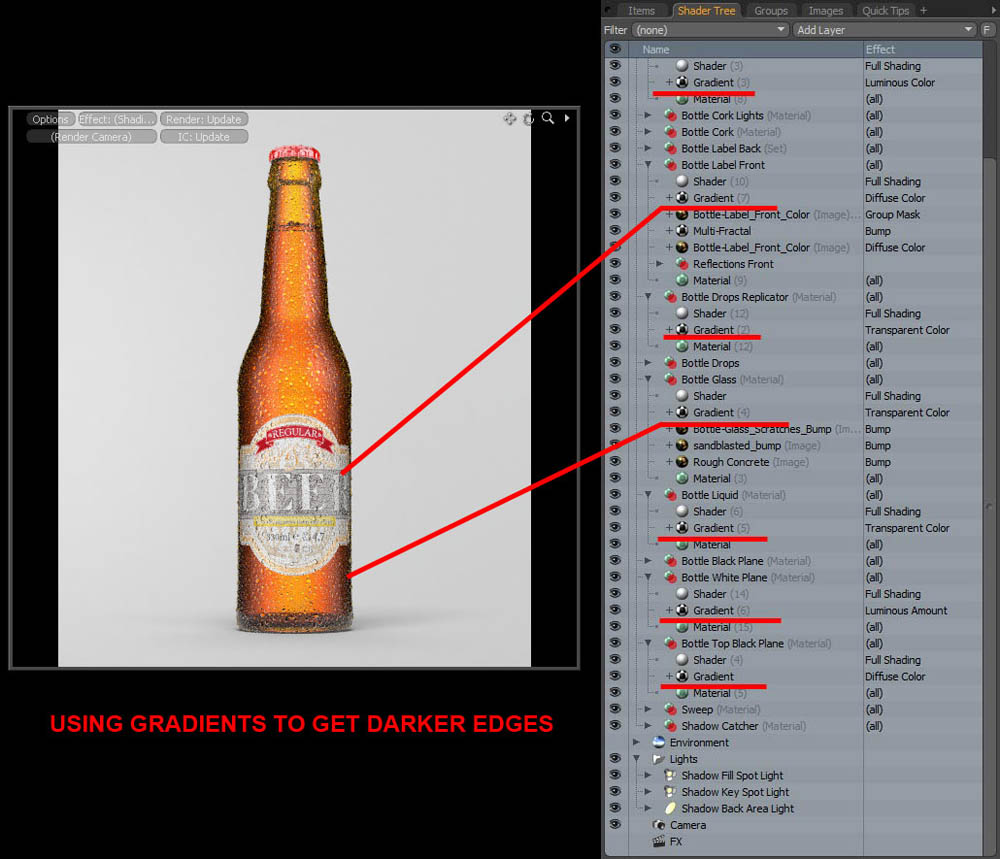
Materials
Working with materials was one of the hardest part in this work. It was a little bit challenging to get materials to work properly and to get 'em look like as I wanted.
Remember that gradient is your friend in shader tree. Almost every object in real world have somekind gradient color. Of course modo shadows and lights make some gradients automatically for you on rendering state, but sometimes you need to increase gradient value in objects. Example check out that beer bottle is darker on the edges. I figured out that gradient is very good way to achieve this kind effect and combine it with whole scene make more realistic result. You can also use gradient many other situations, like softening reflections, etc.
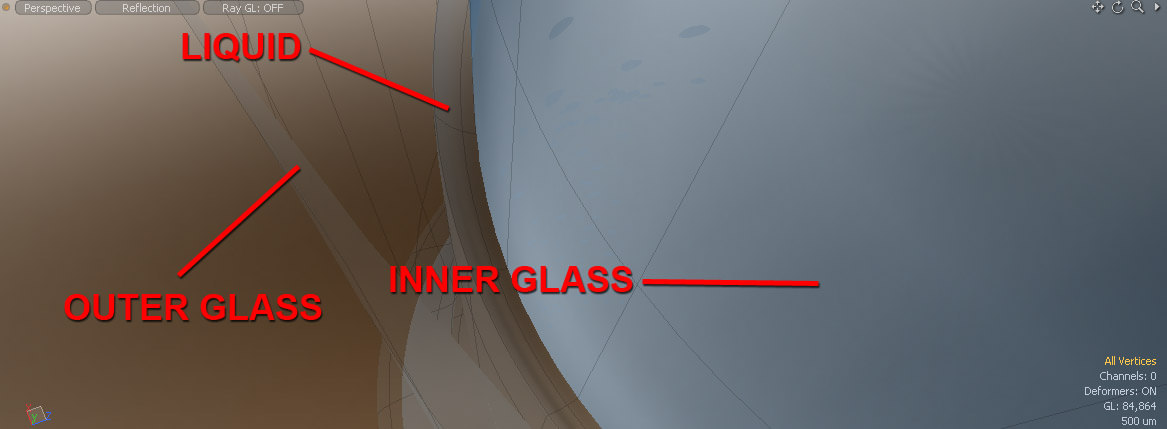
Small tip: If you try to compine liquid and glass together it's best try try overlapping them for the best result. If you leave space between glass and liquid you often get some unwanted artifacts or line because light rays bouncing there.
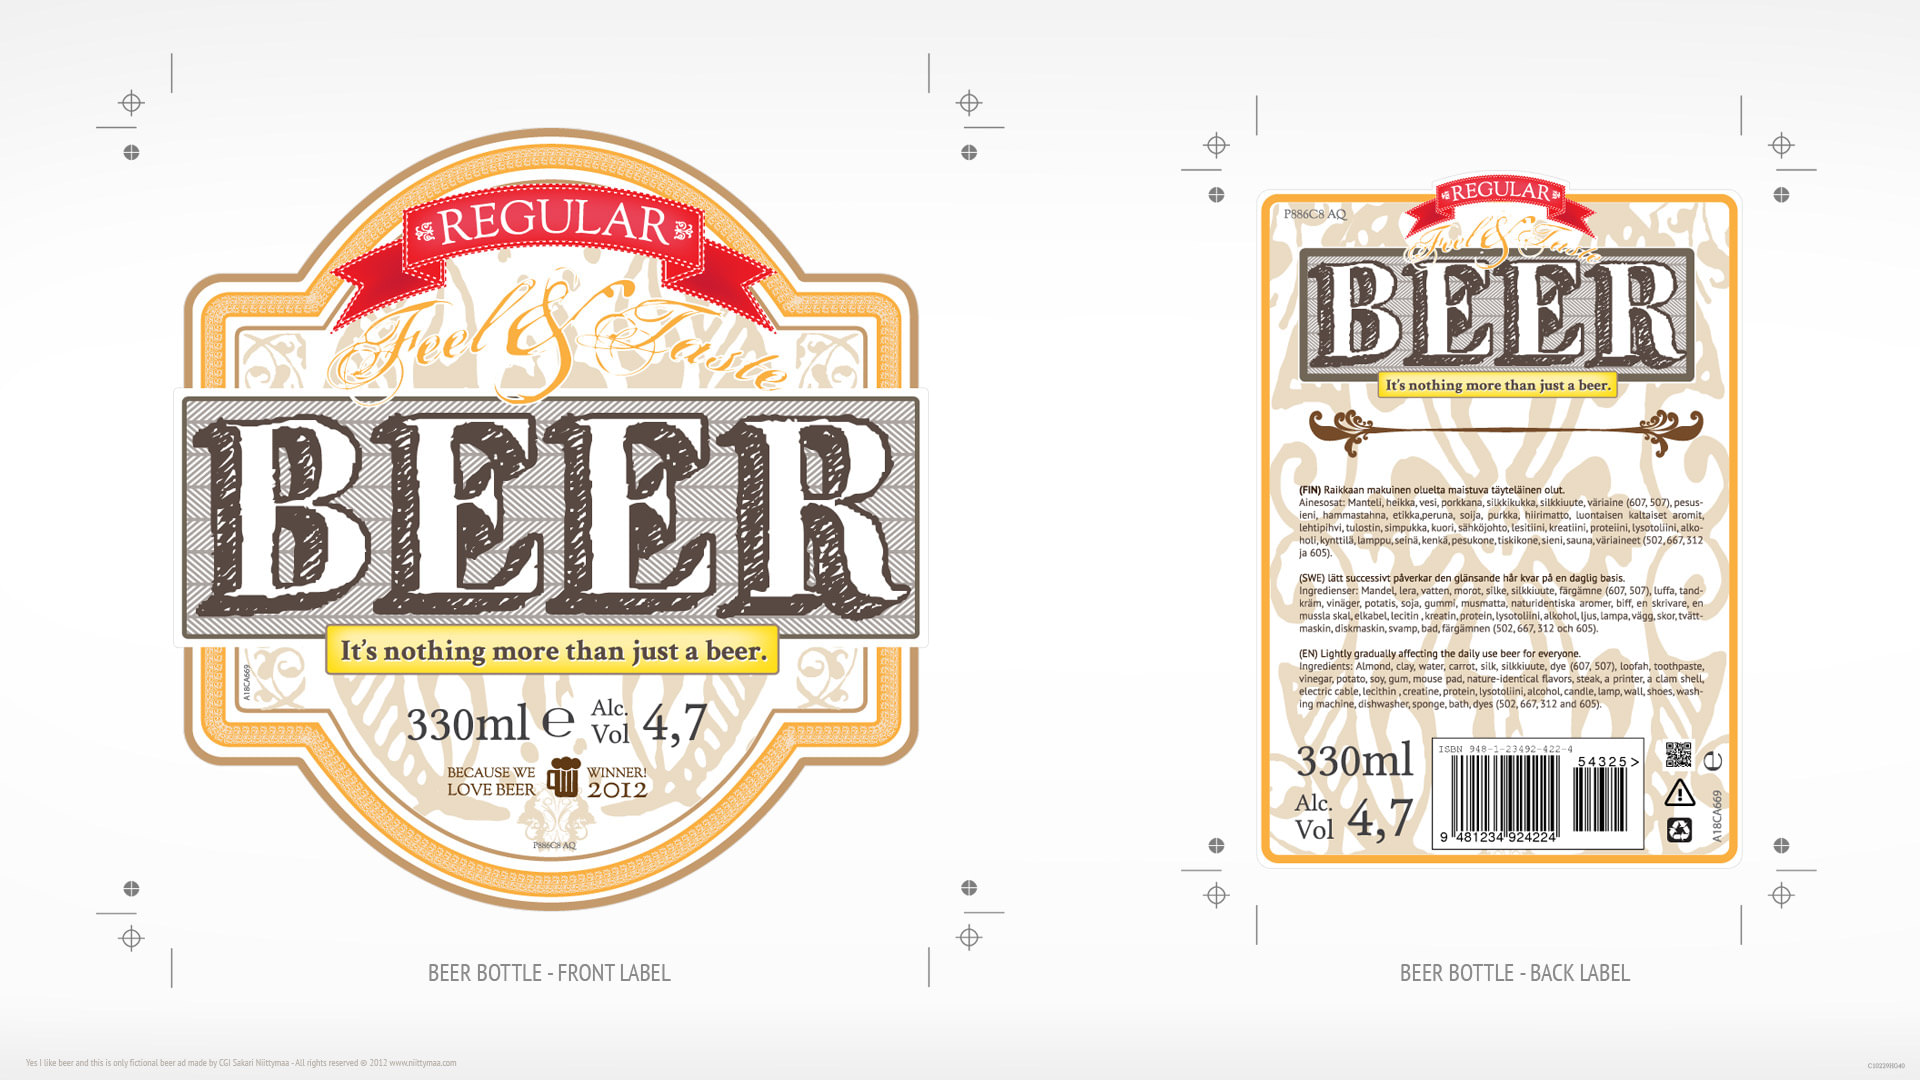
Again I want to make own brand for this product like earlier in "Silkkinen Shampoo" product animation ad. So I designed my own beer labels for the bottle 🙂 Same time there was good time to learn how to make nice specular maps to different part of labels, just as in real world in many beer bottle labels. Here is color and specular maps for the labels.
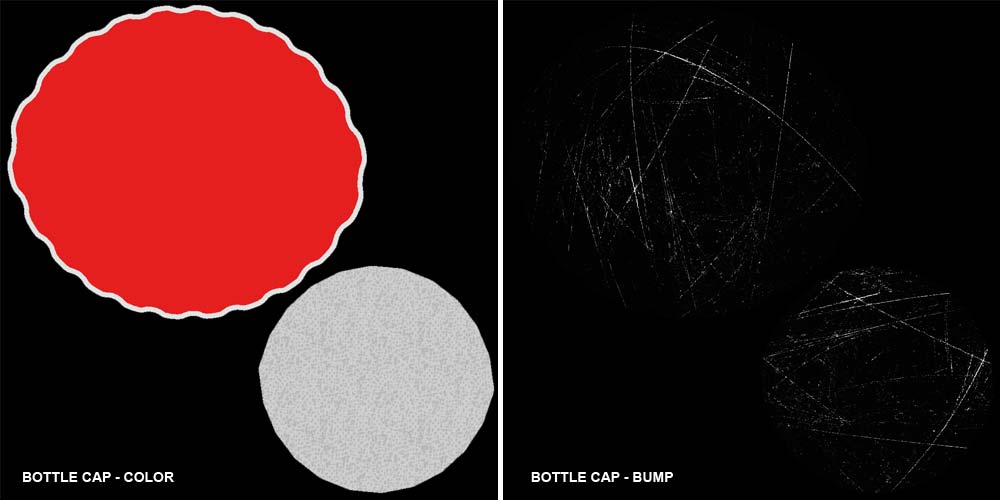
Bottle cap was easier part of texturing. There is only simple color and some scratches in cap.
Drops
You may wonder how I made those drops on the surface. It is nonsense to model every drop to the mesh. There is couple much easier way to do it. They are "Normal mapping" and "Modo's hairsystem" techniques. Both have their own strenghts and I used that normal mapping technique in this work because there is much more control with self made normal maps. I tested other fur material technique too and result was very good.
Tiling normal map and mask for that:

Make drops with normal map (Tutorial):
Make drops with hairsystem (Tutorial):
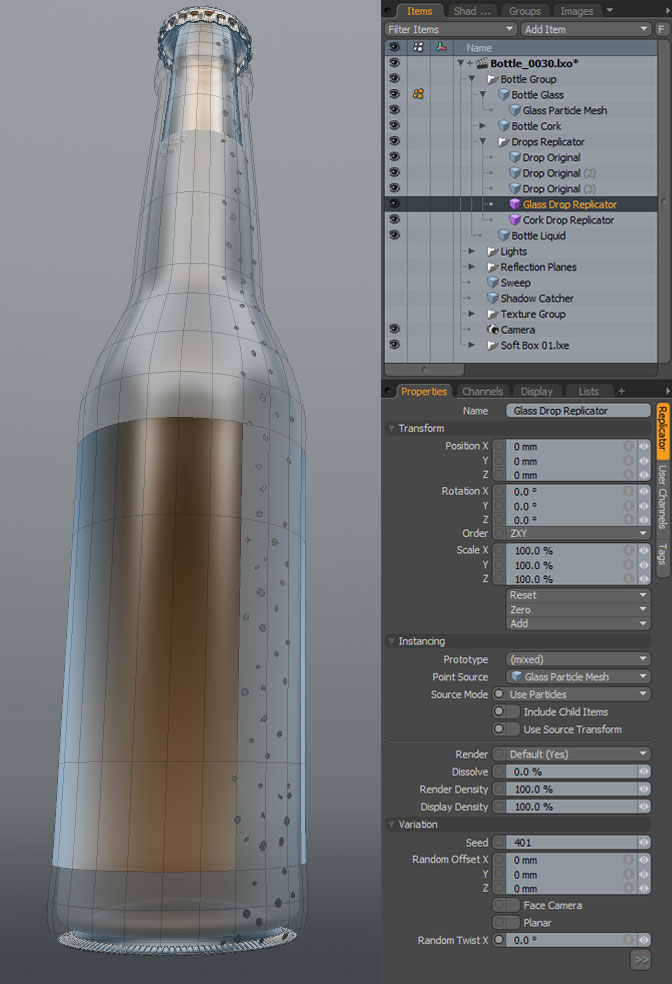
Drops and Replicator
I use normal mapping technique with drops, so there is no geometry changing. I need to break that flat surface on the edges to get some realistic result and I made this with simple replicator objects. There is own replicators for the bottle and for the cap.
Shadow Catcher
I use basic shadow catcher with shadows on the ground. You can make shadow catcher by yourself or just pick up it from Modo's assets (Mesh -> Basic -> Shadow Catcher).
I found that Shadow Catcher could be problematic if you use background image, sweep or something similar and you wan't to render all to one "beauty pass". Usually there is no sense to use only one single pass. Usually it's good to make basic tests renderings with just single pass.
There is no background on this scene, only using alpha channel. That's because this work is designed for further use like in ad or combined with other 2D graphical elements. So I just focused only to the bottle and shadow.
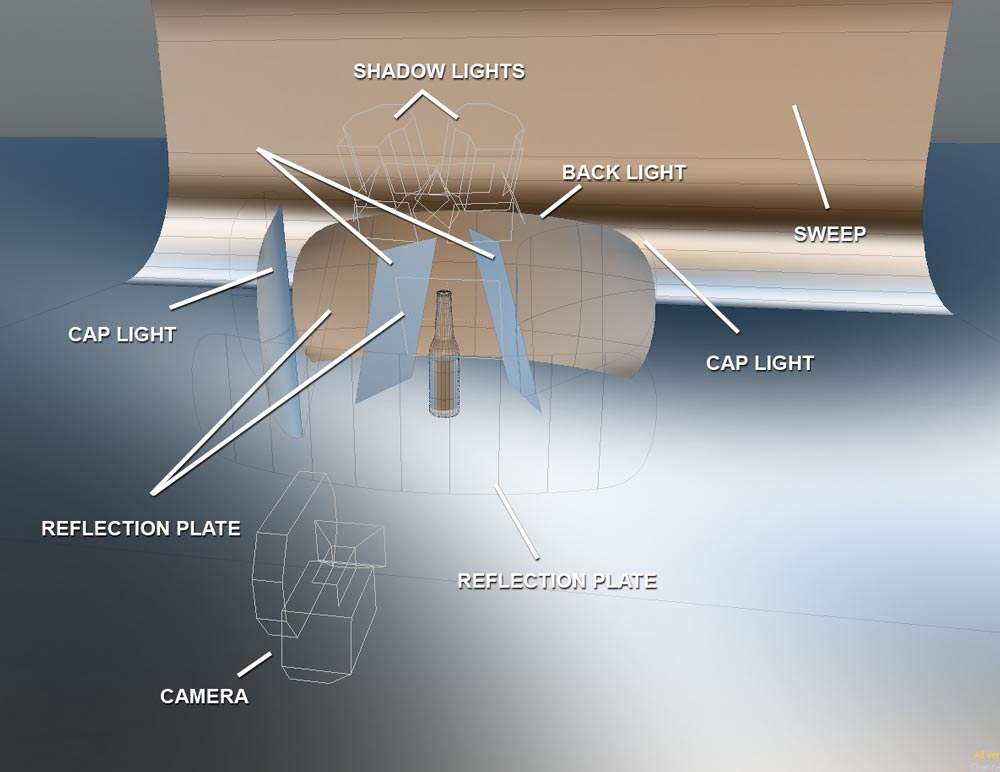
Lightning
Lightning was another tricky part in this job. I spent much time to get enough good result until I find lightning setup that I am looking for. First there was a problems with that hard back light and sweep color. First I started to use black sweep and wondering where is the problem because I do not get desired result with colors. Some time after I figured out. I need to use white sweep to get correct color to Refraction Rays and that fixed my problems.
Here is my light setup in this scene. I use regular spotlights, area lights and also some mesh lights with luminous value.
Rendering
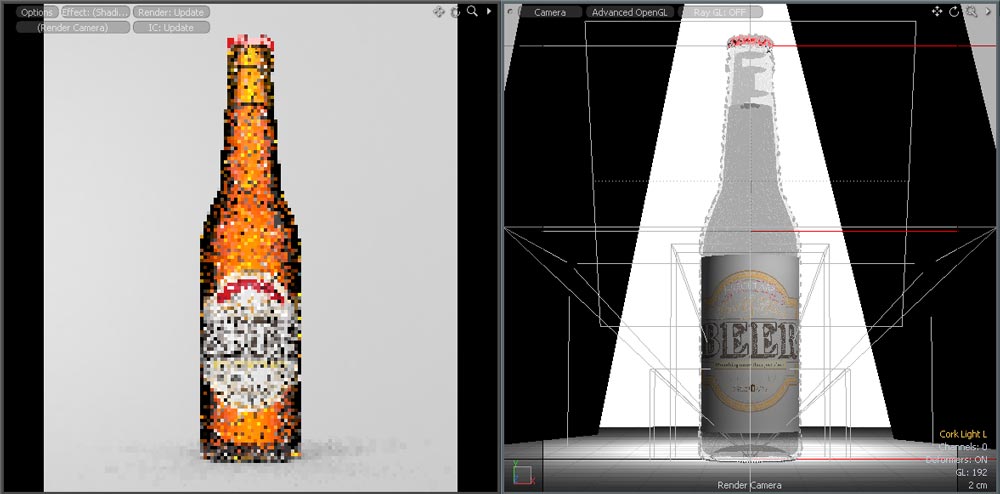
Usually you need to render all the time during the work. Make some test rendering again and again. Even animator need to make some OpenGL or Viewport renderings to check out your animation results.
Modo's preview rendering is like "god blessing" and it's saves much of your time. You still need to render and tryout how things looks like in final render, but it really saves your time and it's pretty fast too. Sometimes it feels like preview render looks much better than final render especially if it's have been rendered a long time and your "Extended Refinement Passes" is turned on 🙂
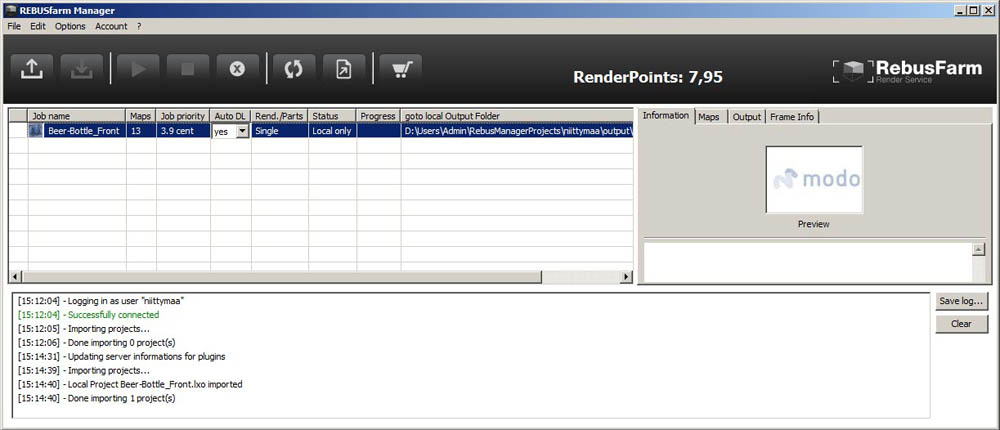
Rendered with render farm
I decided to give a try for commercial render farms because many try outs with RenderPal and modo's internal "Network Rendering" isn't working properly.
I found this quite famous render farm called Rebus Farm. I actually surprised how well it worked. There is free trial period where you can have 10 render points for free (1€ = 1 render point if you buy some more). Images that are rendered with these trial points got some watermarks on image. You you can get rid of these marks if you buy any render points with real money. I bought 5 points just for the try this service.
There is two mode in Rebus Farm that you can use. Them are single machine or multiple machines. If you render with multiple machines it cost more and they recommend to use this only if rendering took over 5 hour with you machine. I try out these both modes. That single machine renderer was about twice times faster than my own computer 🙂 and that multiple machine renderer was much faster!
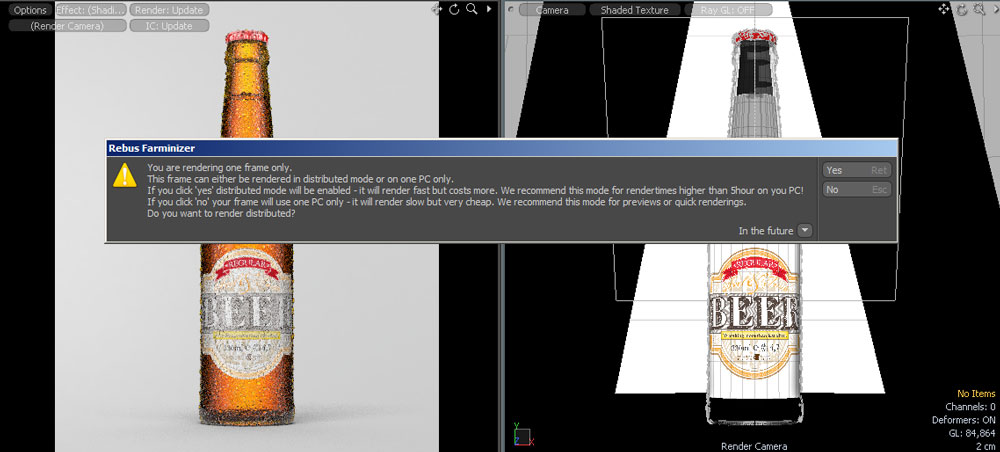
Rebus Farm works really great with modo and I can recommend it anyone who wanna use commercial render farms. They are great if you really need some speed.
Overview
It was really nice to work with beer ad and with beer! Again there was so many new things for me. Now I know more about modo's Shader Tree, Lights, Product Shots and Rendering. This is good point to end summer vacation and start to think about coming traineeship and final/dimloma work.
Thank you so much! Super helpful
Hi!!
Re-read your article. You can share the scene with settings render without models and textures? Thank you!
Hello
Very good work done this, I’m investing in 3D mode as well.
The scene you created for the beer was very good, but I tried to hold and not getting hit. You have only the scene. LXO? or a brief explanation of what materials did you use?
I have a client where I’m modeling mineral water bottles and many would like to get a result as accurate as yours.
Thank you for your attention.
Hi Daniel and thanks for your comments.
I sent you a mail about this topic. Hope it helps 🙂
Very impressive.
I’ve just been struggling with exactly what you’ve done here.
I love the use of gradients to darken the edges – I don’t understand gradients yet but can see how powerful they are and it’s definitely something I should learn.
Thanks for the story!! useful information