I've always wondered how those great digital sculptors made those incredible images. I'm very far from that still and that's not suprice because this was actually my first human sculpting in 3D program 🙂 I've used sculpting tools just in props details, but never tried to sculpt human character. I think this was my weakest point in 3D skills. Now I try to learn it some because there is so much new possibilities in 3D if you can sculpt well.
I do not have ZBrush or Mudbox which ones is special softwares for the digital sculpting. But thank god we have Blender and it's good for this kind job. So in this post you find some of my notes while I making of my first "human head" sculpt in Blender. So lets get started...
Settings For The Sculpting in Blender
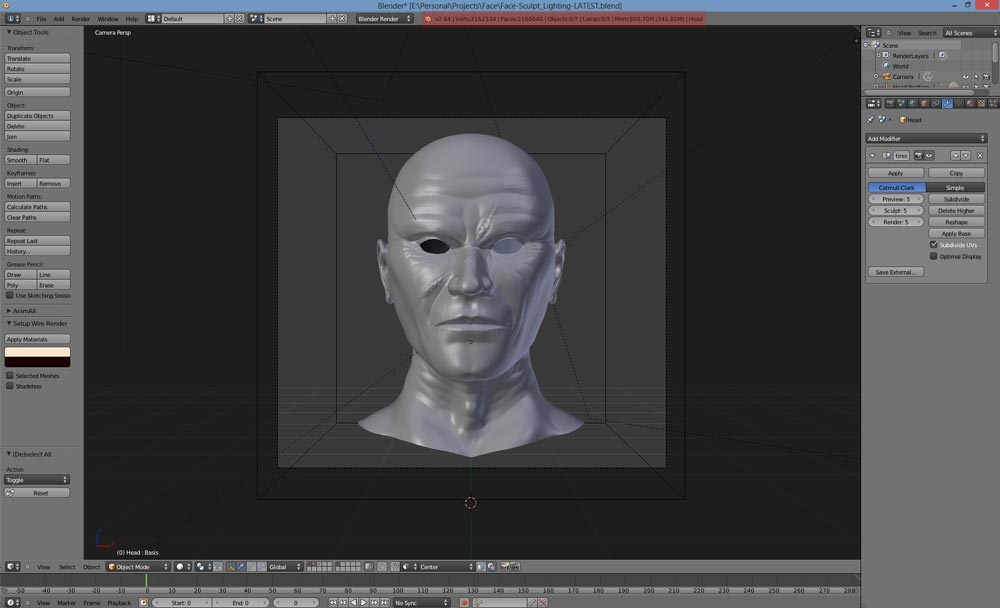
After my head poly count going over 2 million I wondering what happends to my performance! I found some topics about Blender sculpting performance and you really need to check out these settings if you want to make little details like wrinkles, otherwise you'll lose your nerves with huge lag like I do at the beginning. There need to be enough vertices to make small details...
So here is some tips for the better performance in sculpting process in Blender:
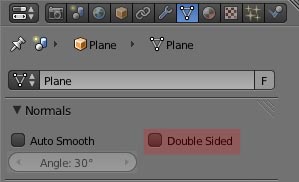
Most important settings for me was turn off "Double Side" settings for mesh.
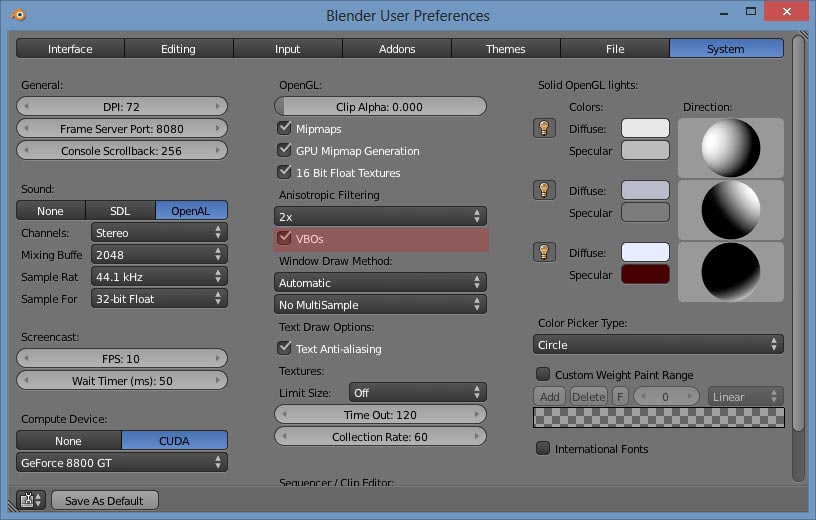
Check out that VBO setting is turned on in Preferences.
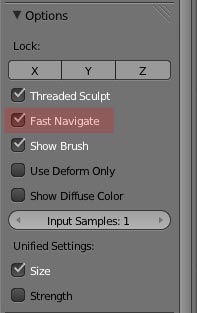
Turn on state fast navigate from the side panel.
There is also good video tip from BlenderCookie about similar topic http://vimeo.com/8970596
I found these tips from the Blender Artists forum topic. Thanks fellows...
Brushes
Here is basic brushes that I found most useful in this case.
Grab and Draw
Good for shaping large sections like cheeks and eye sockets.
Crease, Inflate and Pinch
Good for final features like lips, eyelids, wrinkles and nose trail.
Flatten and Polish
Flattening surface away and sometimes just smoothing process. Sometimes if smooth doesn't work properly try out these ones.
Smooth
Smoothening surface and remove some unwanted points.
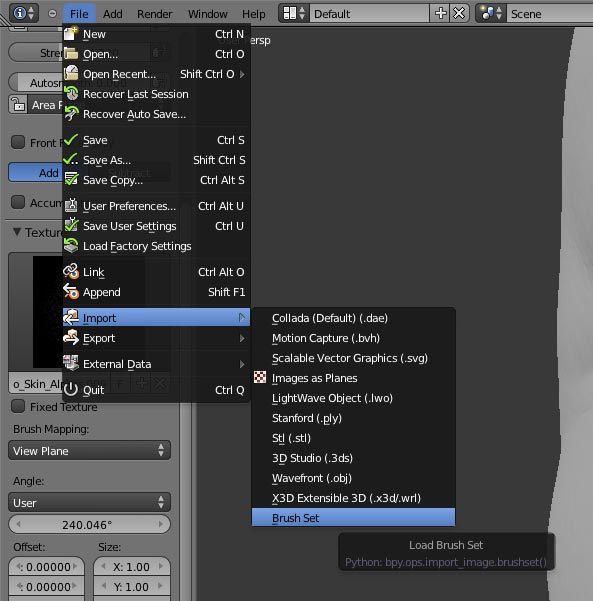
Import Brush Set Script
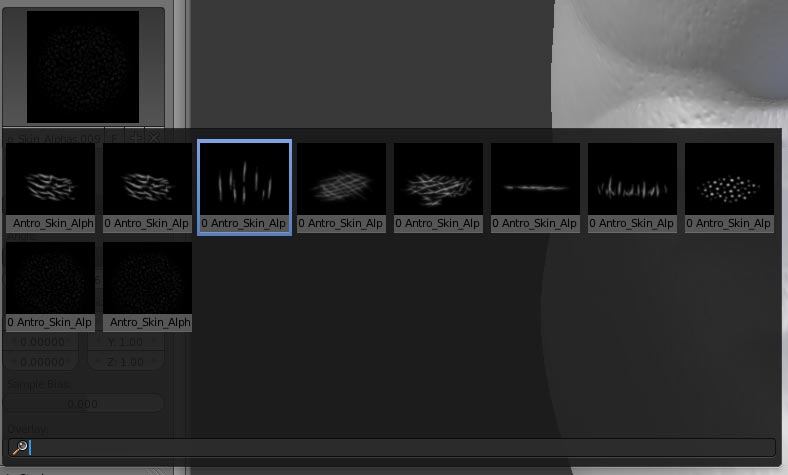
Remember that there is good script that import all of alpha images from chosen folder. So it's quite easy to import whole brush set to Blender. If you do not have script already in addons, you can download it straight from the blender SVN addons page: https://svn.blender.org/svnroot/bf-extensions/contrib/py/scripts/addons/io_import_BrushSet.py and just install it.
Simple as that. Now you have all of your brushes available instantly with that simple script.
Where you can find good custom brush images
There is many place where you can find good images to use in sculpting brushes. I think one of the best is http://www.zbrushcentral.com. There is many topics where users share them goodies.
There is also gallery of alpha images in Pixologics website http://www.pixologic.com/zbrush/downloadcenter/alpha/
Texturing Process
You may wonder where you can find face images for the projection painting of your character. There is so many texture sites that provides all those rock, grass, metal, scratches, etc. textures but usually those site doesn't keep human faces in their collections. Here is couple site where you can find human faces for your job.
http://www.fineart.sk
http://www.3d.sk
http://free-textures.got3d.com/natural/free-character-references/index.html
http://www.morguefile.com
http://www.artmorgue.com
There is also other sites where you can find good references or textures for humans. Like this great sculptor:
And of course forums is good place to search also, like this thread:
http://www.cgtantra.com/forums/showthread.php?t=2966
Sub Surface Scatterin (SSS)
This is really important term to know if you especially want to make realistic and organic things. There is good enough explanation in wikipedia about this topic (http://en.wikipedia.org/wiki/Subsurface_scattering). After this SSS came more popular last ten years we have take one step ahead in 3D world, I think so.
You can find much information from web about this topic. There is also some good tutorials about SSS materials. I tested out some SSS techniques in this human head skin shader (one layer and three layer style).
There is awesome tutorial about this SSS materials and Skin Shaders from BlenderCookie. It's one of the best tutorial for realistic character in Blender that I have found. I really can recommend that whole serie!
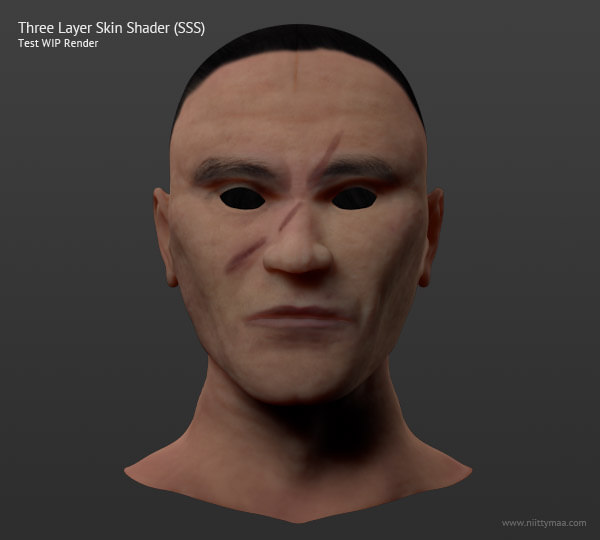
Here is WIP render from texturing/shading process. I haven't tweaked it, just want to make fast test out what is all about that three layer skin shader.
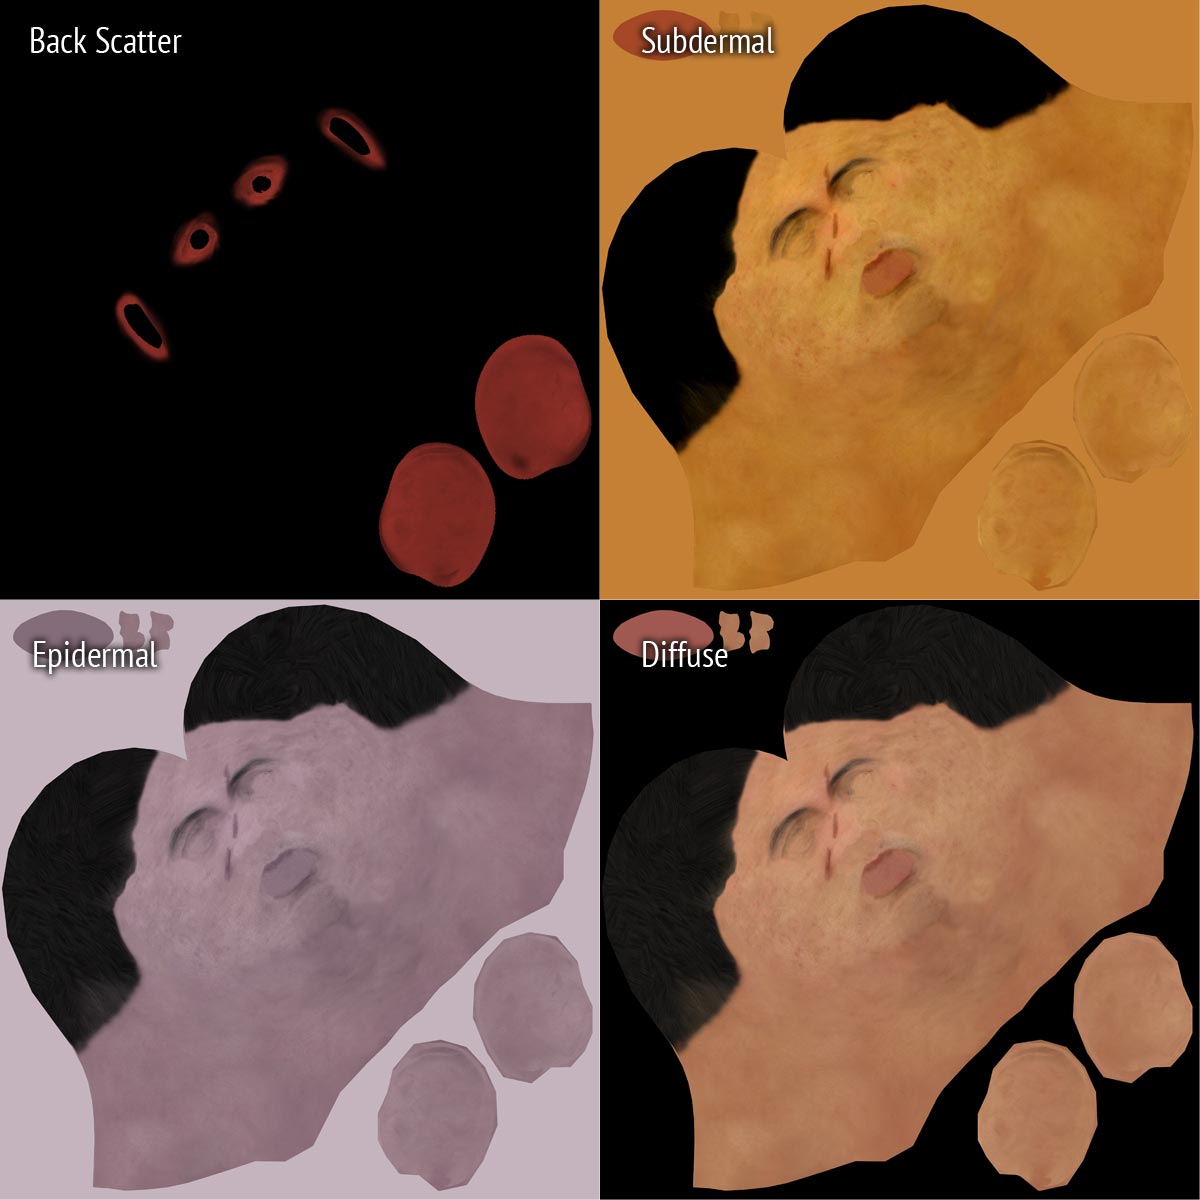
And here are those maps that I have used in that skin shader.
Important Links in This Case
http://cgcookie.com/blender/cgc-series/series-creating-a-realistic-head-in-blender/
http://www.pixologic.com/zbrush/downloadcenter/alpha/
Final Summary
After I have done this sculpting session I really can say I learn a lot again. I never knew before how nice this digital sculpting is.
I do not use images in this case (only in skin shader), because I just wanted to learn sculpting tools, not the human anatomy at this time. Learning anatomy is important if you want to sculpt very realistic results. So this sculpted head is totally fictional. I guess it is better to use some reference images if you sculpt humans. I have theme "old warrior" and chinese man in my mind when I sculpted this.
Sculpting is totally new section for me, but now I have taken first steps in this exciting new technique. There is so much to learn about sculpting and I know that best way to achieve better end result is just make and make more.... And watch how pros make their masterpieces.
So here was my notes about this process and now I move to the next sculpting job. Thanks for reading!


Not bad at all! Much better than my first one.