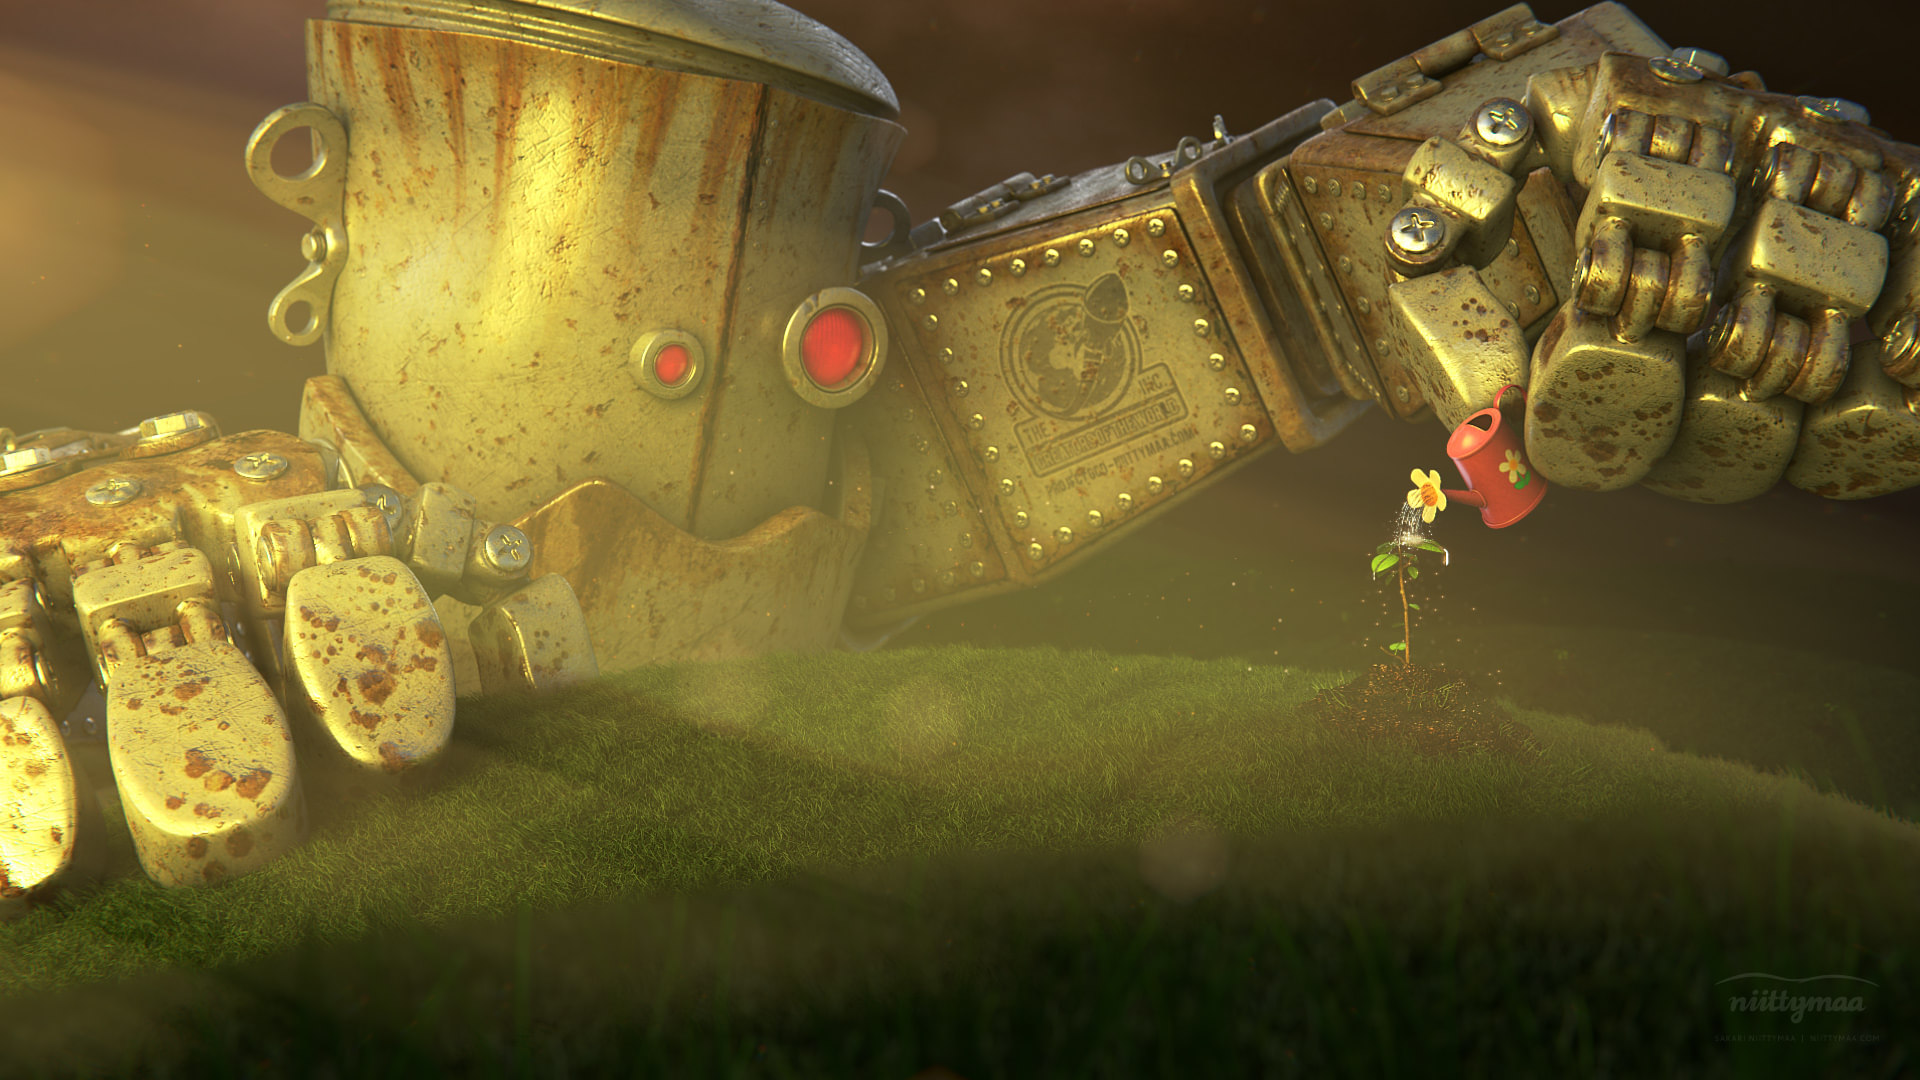
I made this work for the newest BlenderGuru.com competition where's the topic is scifi! And yeah! I have always liked scifi genre and now I find some time to make new 3D personal project while I'm at holiday. So this post is small breakdown from this "God's Project" image and how I made it with 99% Blender (only some photography textures taken and edited from cgtextures.com).
Breakdown
At the beginning...
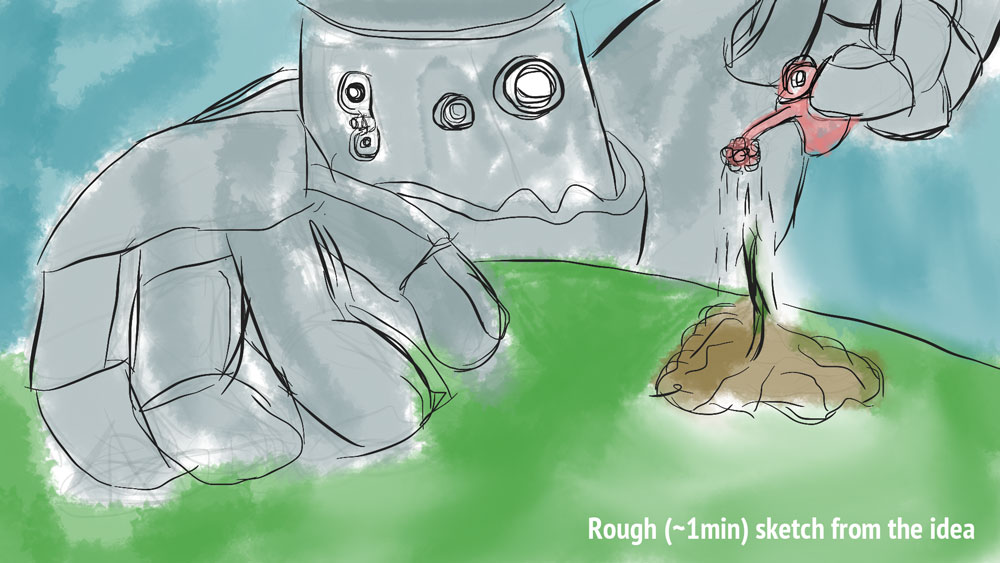
I got this idea about "God's Project" when I waiting a bus on a while ago. I made a fast sketch with my brand new iPad and here is my VERY ROUGH 1min idea sketch. Just wanted to be sure that I do not forget it 🙂 And maybe I can use this later if I want to demonstrate "1year old child drawing" in somewhere 🙂
Like always, I tried to learn new things from CG. In this project I guess it was "Composition Features" in Blender. I never used composition tools in Blender so much, because usually I made those post effects in Photoshop or After Effects. Now I want to make all in Blender (exept photography textures). After all composition experiments I found that Blender is awesome also in this section!! With nodes I can do anything that I want and I can avoid to jumping around in different programs. Of course this workflow isn't best with colloborative works, but in personal/single men projects this is great option.
Modeling
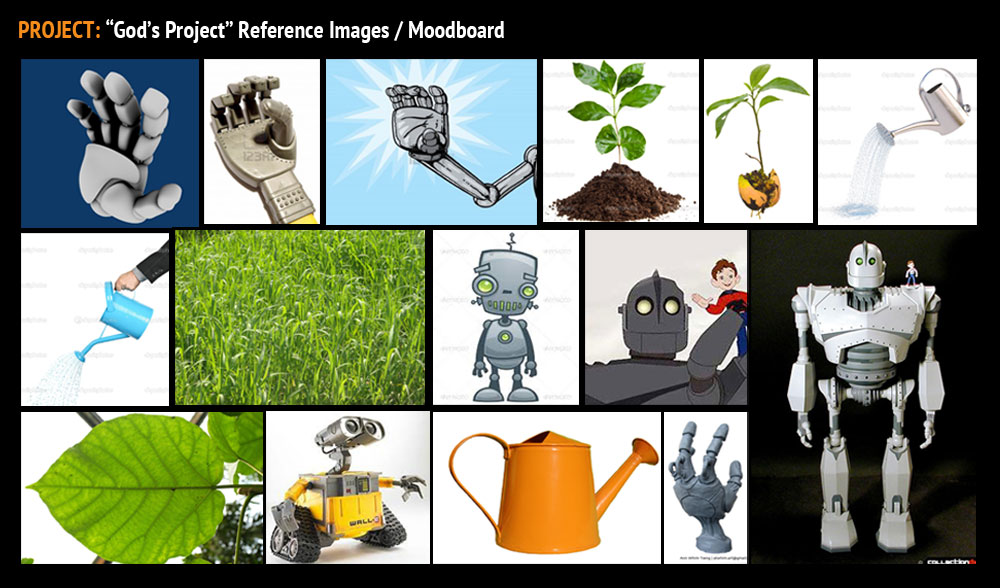
As always, remember to use reference images and moodboards to clarify your idea at beginning. Here is some photos that I googled out for this project.
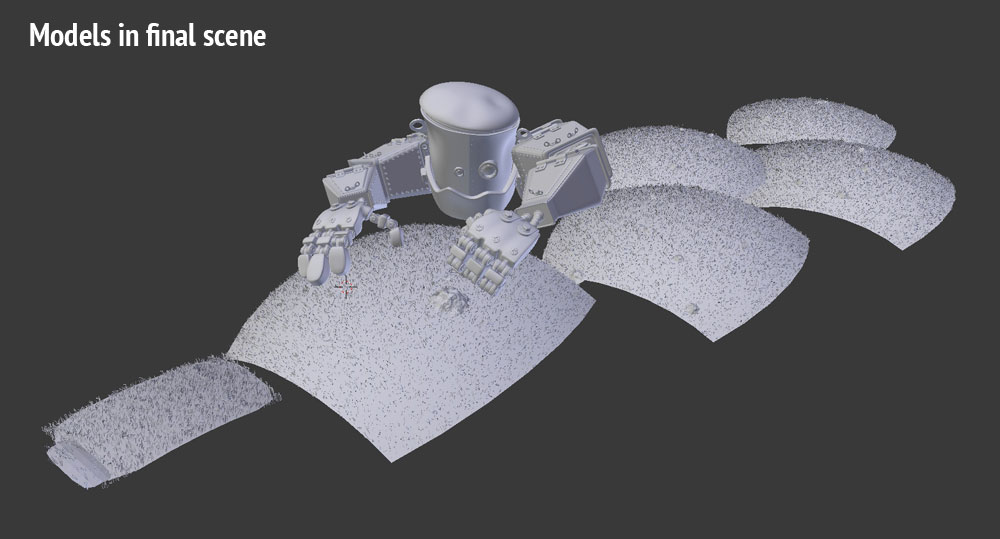
There isn't nothing so special modeling techniques in this project and I try to focus the overall look of the image and try to avoid too complex models because of time. I also try to keep good mood on and focus more from artistic way on this project. Style that I choose to use was something between cartoon and realistic -> mainly realistic textures and more cartoon style in shapes.
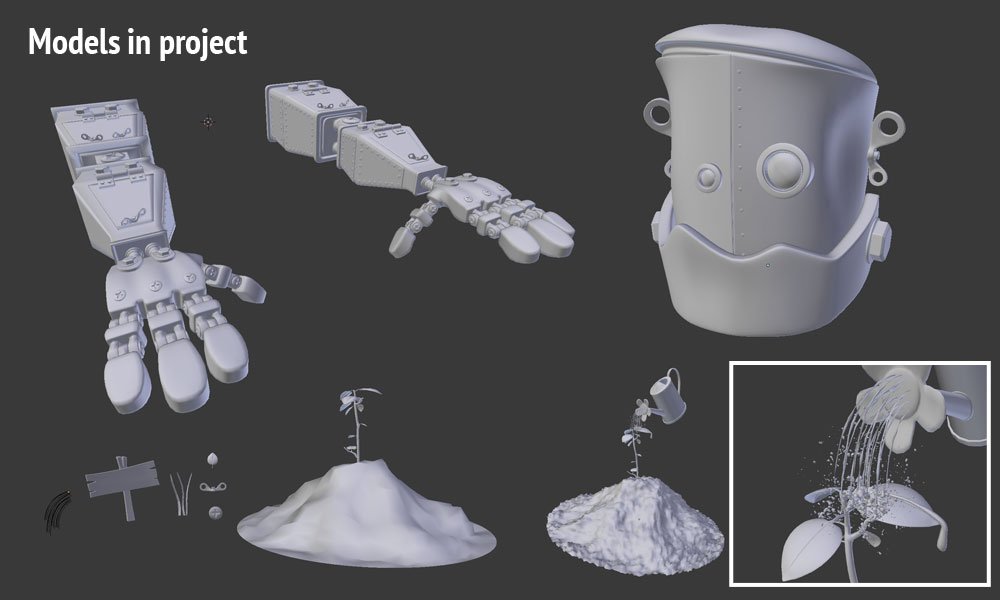
Here is how all geometry is positioned in final scene.
Textures
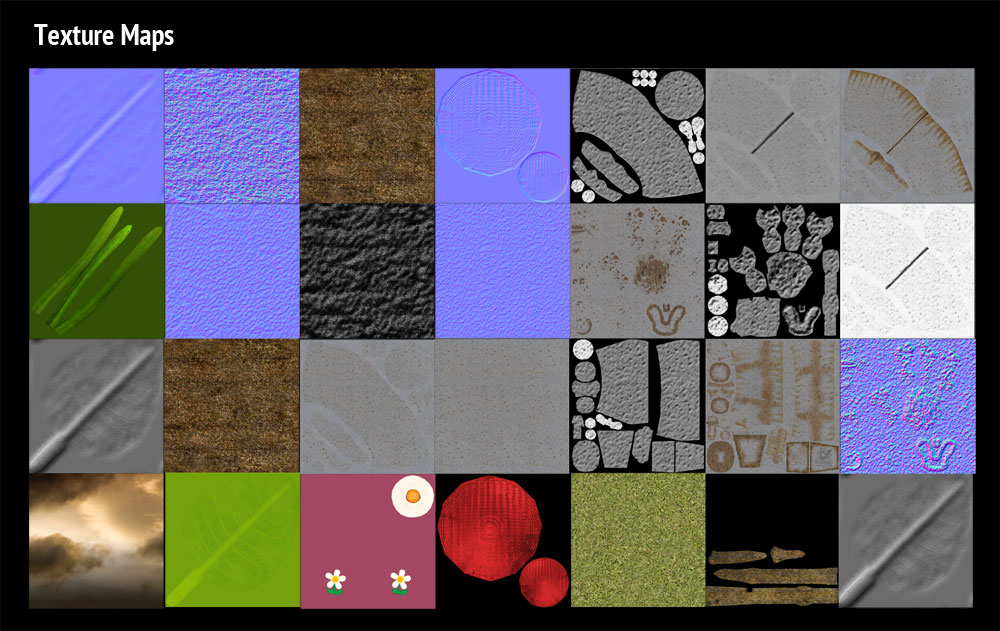
Texturing in this project was quite straightforward part because of simple objects. Even those are quite simple objects there is still many maps that I have made, so it takes some time. At the end I quess some of detailed textures was useless because long distance or blurred image.
I use couple photos from cgtextures.com and match/fix them to the objects. This is only part where I use photoshop to generate/edited some "Diffuse Maps", "Normal Maps" and "Specular Maps". Here are most of the texture maps that I used in this render.
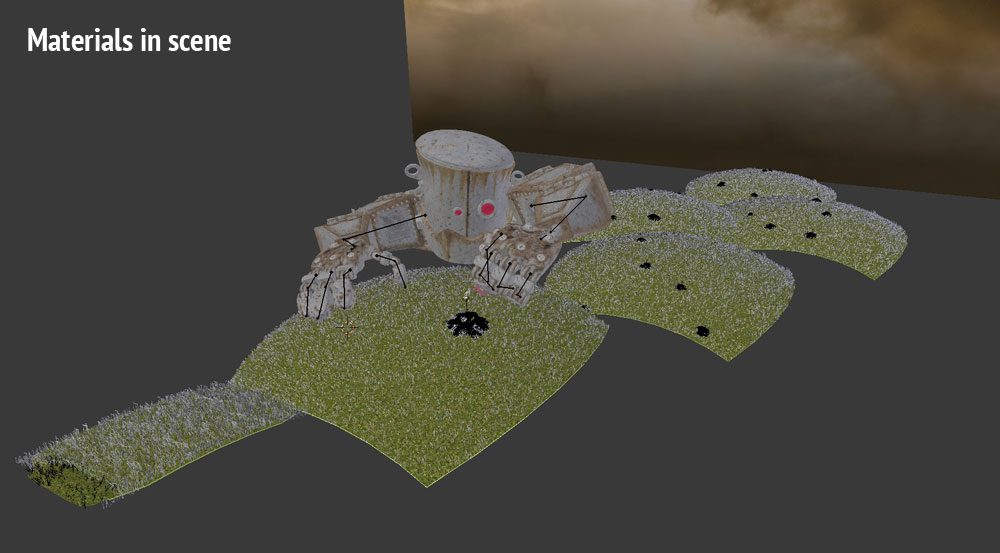
And here is some material view from the scene.
Lighting
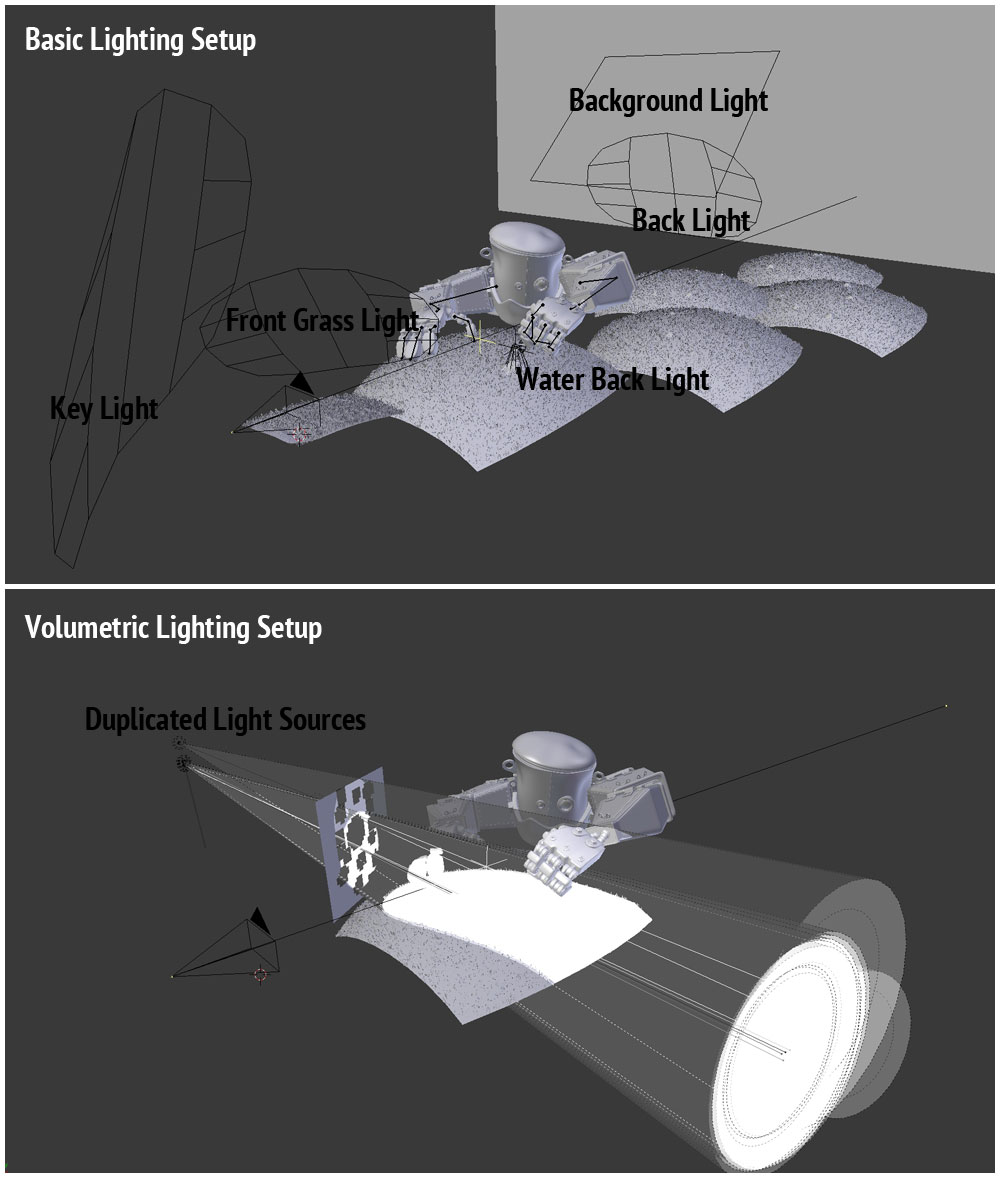
Lighting is always fun part because then you are already in that stage where you can see some "eye candies" and clues what the end result can look like. I tested out different light setups -> like day, mid-day and night, but after all I ended up to this not so realistic lightning. I want to get more feeling like "after world is gone and need to start new beginning" to the image. I think end result is much of that what I tried to achieve.
Here is basic light setup and volumetric light setup.
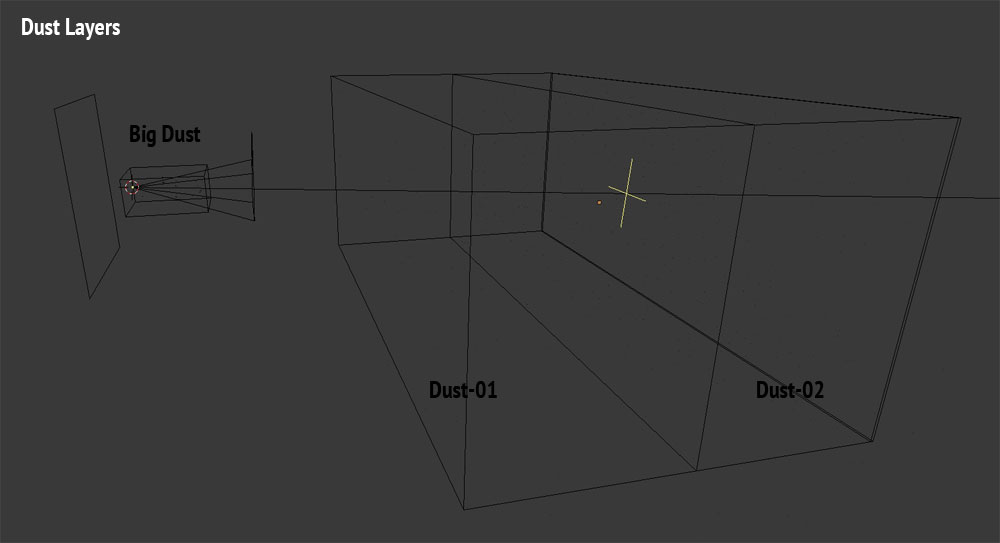
Dust
I want to add some dust to the image. Because I wanted to made all inside of Blender this was quite simple task. I added different dust layers to get more control in composition part.
Rendering and Compositing
I made many test renders along the way. Here is some images from the test render folder.

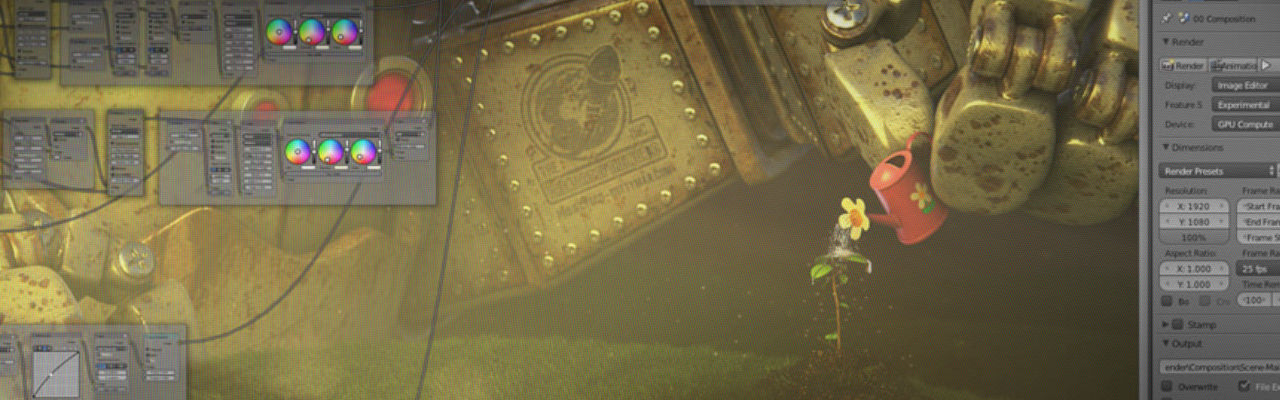
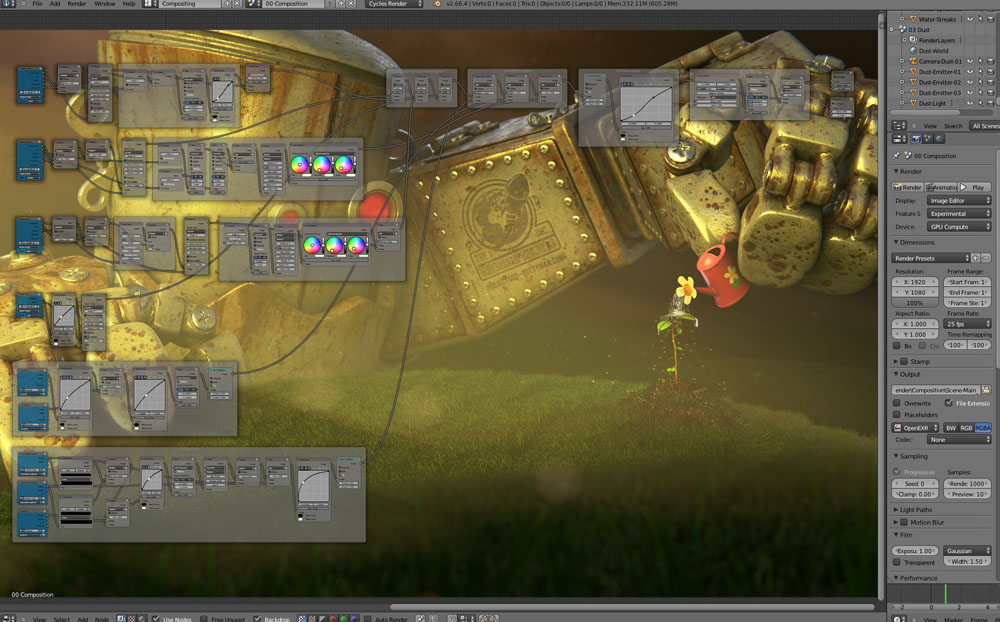
This project was very instructive for me about the Blender compositing tools. I taught them to myself by testing different things and combining them into the final composition. There is many good nodes that helps you to achieve good result and I really like this "node thinking" style in thesedays. Final composition scene was quite mess, but those frames and styles helped me to keep everything under control.
QUICK TIP: Render still image to OpenEXR MultiLayer format
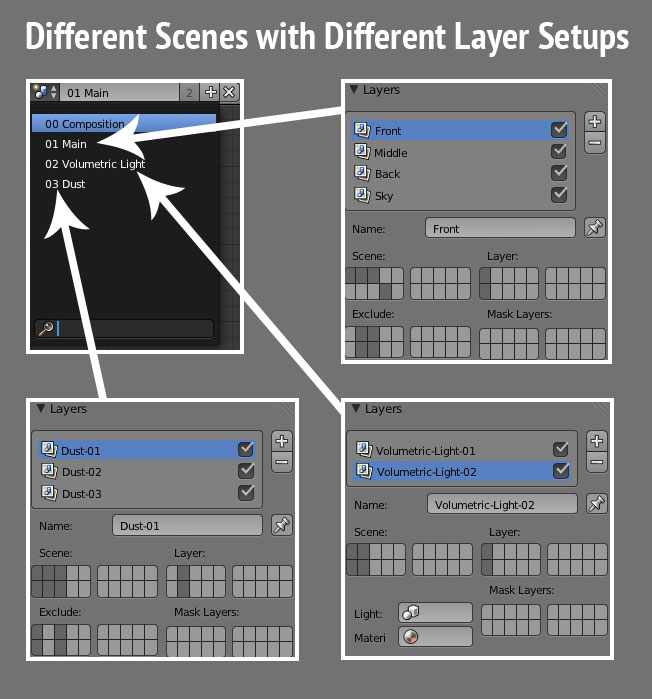
After I came to the point where the image was good enough and I can start to compositing process I face problem with the image formats. I wanted to use MultiLayer OpenEXR to get all render passes to the same image. That's because I have many different passes and scenes with different setups...
First tries failed because I tried with "Output File" node to save images to the disk and there no was any properties to save EXR in this node. So I do not find good way to save MultiLayered OpenEXR with this node.
After a little testing period I found good solution that works perfectly. Jus render "Animation", but limit frames to 1. So here is image to tell what I mean.
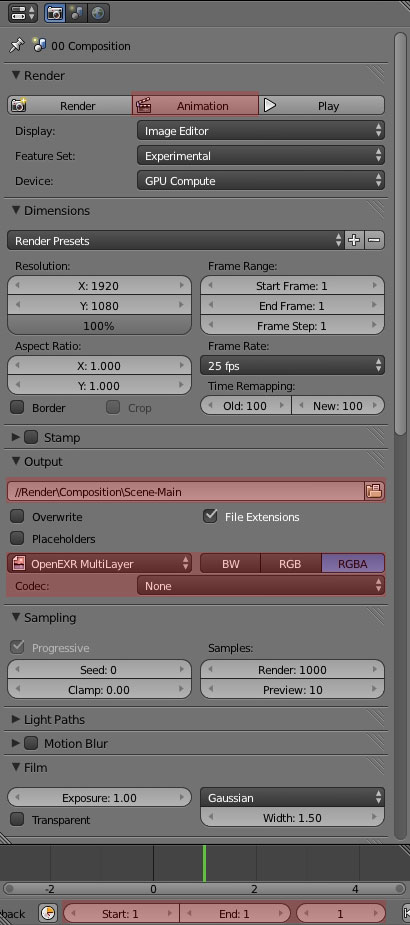
That save all of my layers and their passes to single OpenEXR MultiLayer format. This makes my life much easier in composition part, because now I just import one file and choose right layer and right pass from it.
I have many different scenes, layers and passes in this project. So this was good way to work with image files.
Summary
I really enjoyed this whole project. It's fun to take new challenges, and what could be better way than the true competition. Now I'll send this final image to the competition, so wish me good luck 😉
Thanks Bonkers! That “Volumetric Lightning” was done in internal and cycles combo. So you have already know the answer 🙂 I guess it’s easiest way to do it atm.
Really impressive, it has a great a atmosphere. May I ask you how you did the volumetric lightning with cycles? Or do you use the blender internal renderer and than compositing?
Thanks for your comments! I really appreciate them.
GREAT!
This is a beautiful image – really nice lighting and also the textures.
Oh god this is great! 🙂 Thanks for this breakdow niittymaa.
Soooooo epic!!! I really love this. Congrats!