In this post I will show how I figured out workflow to make ID Map/Color ID map. This process included "custom color material", "atlas mapping" and "baking process" in Blender 2.71. It's not big deal and hope this could help you a little bit...
1. Create Color ID Material
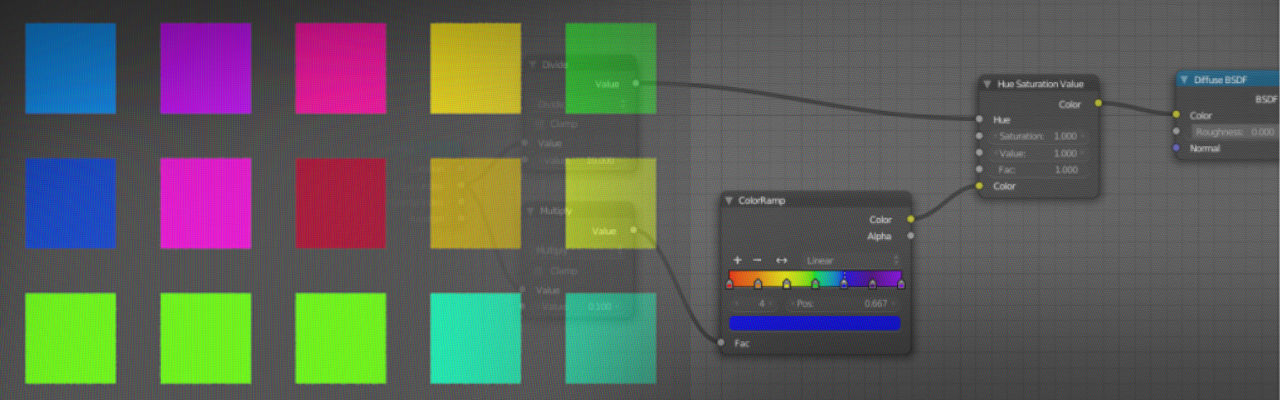
Ok, first let's make material that get "unique color" from "Object Index" number. This is useful in scenes where you have many objects and you want to get unique color from the different objects just with changing the object "Object Index" number. Put this same material for every object in scene that you want to be included in Color ID map.
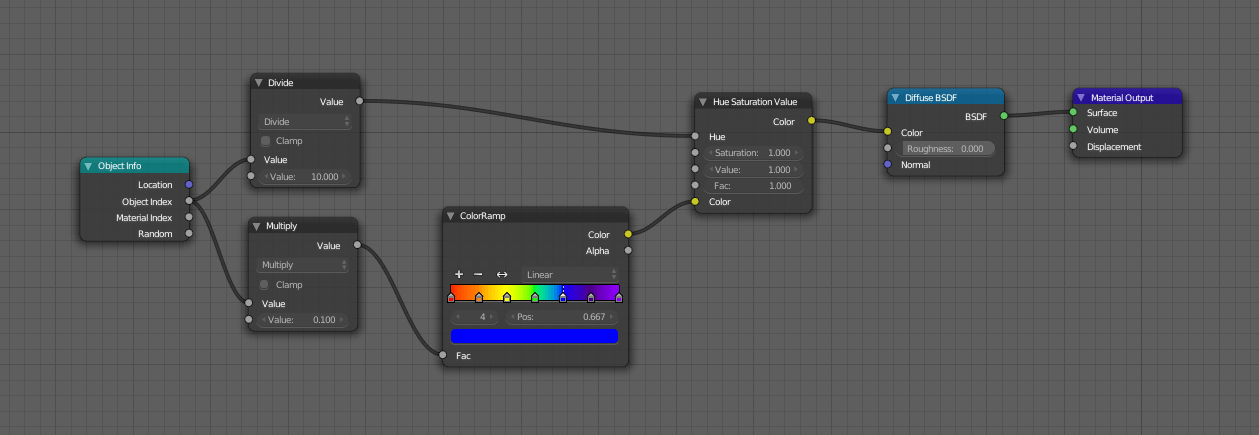
If you want to change colors you can just adjust "Math Node" values in material node settings. There is many ways to do different color with nodes and you can even use Random property. This is only simple one solution. But remember if you use random values then every object have random color even they share same Object ID.
2. Set Object ID numbers for the objects
Select object that you want to use unique color and set the "Object ID" number from object menu and field called "Pass Index". If you want to put same color for separated objects then just put same "Color ID" for them.

Now you have unique colors in every object that have this material.
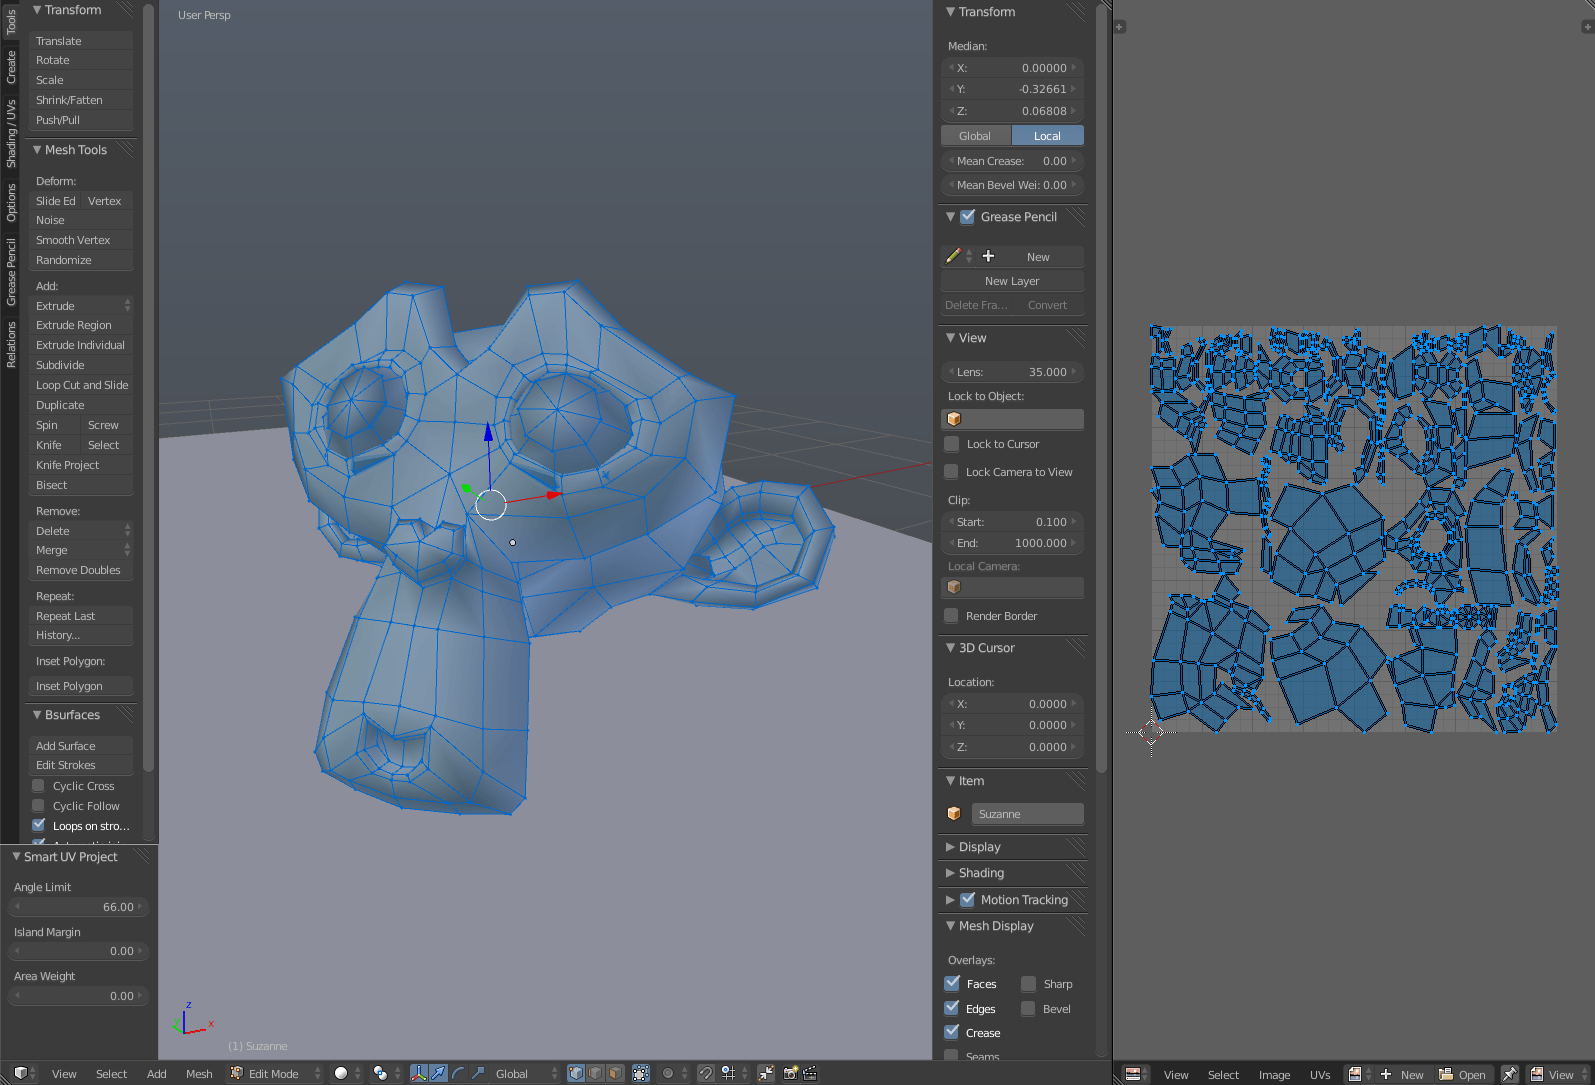
3. Unwrap objects
You need to unwrap every object that you want to included your final "Atlas Map". So do it now in your own way. I use fast "smart unwrapping" in this demo process.
4. Make Atlas Map
Now let's make "Atlas Map" with using a great addon called "Texture Atlas". You can grab it from here: http://wiki.blender.org/index.php/Extensions:2.6/Py/Scripts/UV/TextureAtlas
Once you have installed addon it's almost automatic process. Just select your objects and create new Atlas from the toolpanel.
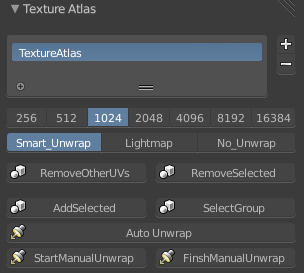
Select size for your Atlas Map and press Unwrap. This addon makes the image texture automatically for you. Now you have "Atlas Texture" with your unwrapped objects there. Do not join objects together yet, bacause we are going to use "Object ID" for the coloring in Baking process.
5. Baking process
We got baking feature to Cycles in Blender version 2.71. Yeah! This is very good improvement! Thanks for the devs! Now let's bake and finish the process.
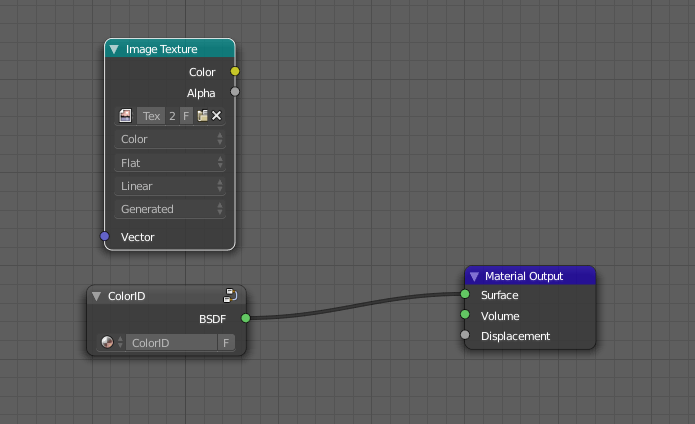
Go to your objects materials and add "Image Texture" node. Select "TextureAtlas" image that you have been created before. Keep sure that this node is selected before start bake. It doesn't need to connect anywhere, just selected. Remember to use your ColorID material and keep it connected. Be sure that every object have this ColorID material.
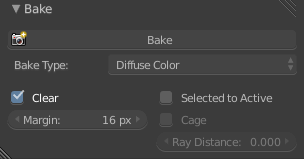
Select all of your objects. Go to Blender bake menu. You can find it from Render options menu. Select "Bake Type" to "Diffuse Color" and press Bake. That's it! Now you have baked the colors to the "Atlas Texture". Remember to Save you image file!
You can always to change objects Color IDs later and bake it again if needed.
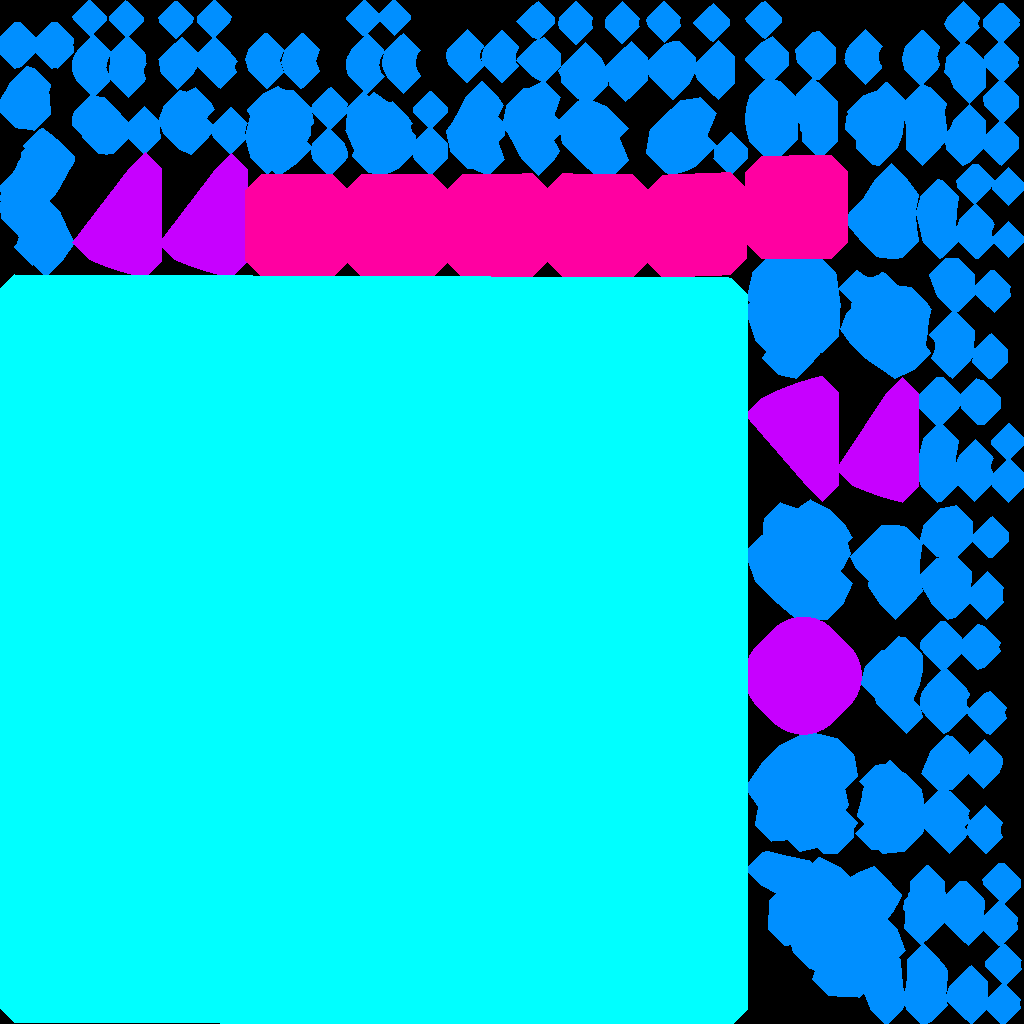
Now we have Color ID / Color Map!
Join objects together or use them separately
Now you can join all objects to one if needed. You can even bake them separately, but be sure that "Clear" option isn't selected in Bake options. That's because it clears out the latest baking result before it start to bake new one.
To use single or separated objects depend how you want to use your scene out of Blender/or in Blender. Like if you are going to import the scene in to texturing program called Quixel you need to use only one object (only guessing, I have not tested it yet). So it's you decision...
Download
Download the .blend file that I have used in this process.
Download “Blender - Color ID Map Example” ColorIDMap_Example.zip – Downloaded 947 times – 170.30 KB
Good job!
Thanks for the tutorial 🙂
Btw. Awesome work & blog