Artificial intelligence (AI) is revolutionizing the creative industry. Stable Diffusion is now accessible to anyone, and there are already various ways to use it in your local environment, keeping it private. I prefer to use virtual environments as much as possible to keep my workstation clean. I recently tried out Stable Diffusion using Windows Subsystem for Linux (WSL) and Anaconda, specifically installing the popular Stable Diffusion Web UI by AUTOMATIC1111. These notes were primarily for my own use, but I believe they may be helpful to others as well.
My Setup
| Main OS | Windows 11 Pro |
| WSL | Ubuntu 22.04.1 LTS |
| GPU | NVIDIA GeForce RTX 3070 8GB |
| SD Web UI | AUTOMATIC1111 |
| SD Model | sd-v1-4.ckpt |
YouTube Video Tutorial
I recorded this whole process on a video tutorial.
Install Process (More Explained Version)
- First Install WSL in Windows PowerShell with command:
wsl --install- If you need more commands for WSL, those are here.
- After we have WSL installed, we can install Ubuntu distro on WSL:
wsl --install Ubuntu- NOTE: It is possible that you are unable to install Ubuntu and have encountered the error "Installing Linux failed, error code: 0x80370114" This could indicate that certain features are not enabled on Windows. To resolve this issue, start PowerShell as an administrator and enable the necessary features using the following two commands:
dism.exe /online /enable-feature /featurename:Microsoft-Windows-Subsystem-Linux /all /norestartdism.exe /online /enable-feature /featurename:VirtualMachinePlatform /all /norestart
- Start WSL if it's not running:
wsl -d ubuntu- Open PowerShell and launch Ubuntu using this command, or launch it from the drop-down arrow near the tabs in the PowerShell window. Alternatively, you can also launch it from the Windows Start menu, it should be listed there after it has been installed.
- Navigate to your Ubuntu home folder, regardless of your current location, use the command:
cd ~ - Download Anaconda:
wget https://repo.continuum.io/archive/Anaconda3-2022.10-Linux-x86_64.sh- This will download that file to the folder where you are located now in Terminal.
- If you require different Anaconda version, change link based to this Archive page.
- Install Anaconda:
bash Anaconda3-2022.10-Linux-x86_64.sh- Run that command in same folder as you have downloaded the file before.
- Clone SD Web UI:
git clone https://github.com/AUTOMATIC1111/stable-diffusion-webui.git- Again, it will clone that in the same folder as you are in Terminal. So I recommend locating it where you have other git folders.
- This will create you a new folder called "stable-diffusion-webui". Go there with Terminal.
- Create environment:
conda env create -f environment-wsl2.yaml- Run this command in the "stable-diffusion-webui" folder. Because it uses environment-wsl2.yaml files for setup.
- Activate Conda environment:
conda activate automatic - Create new folder to "stable-diffusion-webui" folder:
mkdir repositories - Clone more gits with commands:
git clone https://github.com/CompVis/stable-diffusion.git repositories/stable-diffusiongit clone https://github.com/CompVis/taming-transformers.git repositories/taming-transformersgit clone https://github.com/sczhou/CodeFormer.git repositories/CodeFormergit clone https://github.com/salesforce/BLIP.git repositories/BLIP
- Install these packages with pip commands:
pip install transformers diffusers invisible-watermark --prefer-binarypip install git+https://github.com/crowsonkb/k-diffusion.git --prefer-binarypip install git+https://github.com/TencentARC/GFPGAN.git --prefer-binarypip install -r repositories/CodeFormer/requirements.txt --prefer-binarypip install -r requirements.txt --prefer-binarypip install -U numpy --prefer-binary
- Install "Cuda Toolkit" in Conda environment:
conda install cuda -c nvidia - Download model file (sd-v1-4.ckpt) to "stable-diffusion-webui/models/Stable-diffusion/" folder.
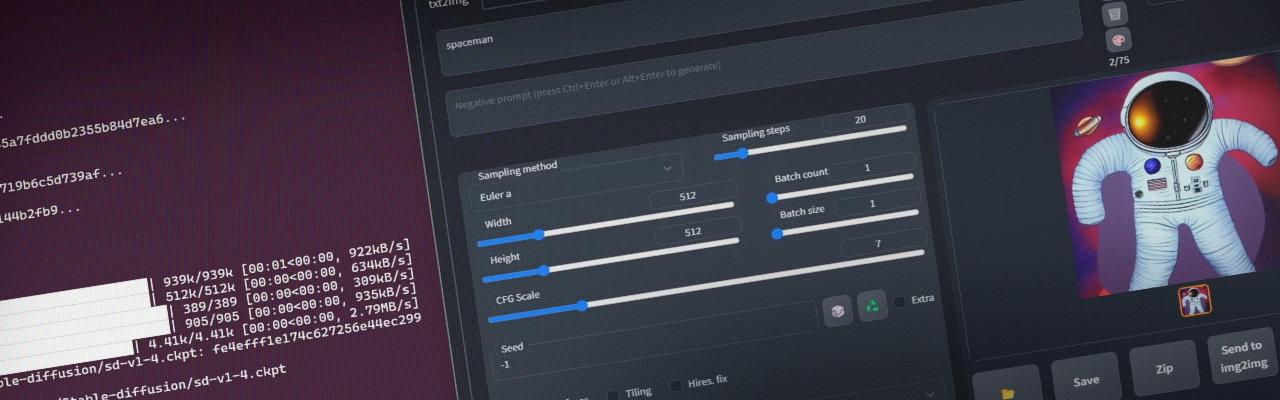
- I used "sd-v1-4.ckpt" model file in this time.
- Add WSL to path with command:
echo 'export LD_LIBRARY_PATH=/usr/lib/wsl/lib:$LD_LIBRARY_PATH' >> ~/.bashrc - Exit and start Ubuntu Terminal again.
- To navigate to the "stable-diffusion-webui" directory within your home directory, use this command:
cd ~/stable-diffusion-webui - And always remember to activate Conda environment before launch Stable Diffusion Web UI:
conda activate automatic - Done! Start Web UI with Terminal command:
python launch.py
Install Process (Commands Only)
# Install WSL
wsl --install

# Install Ubuntu to WSL
wsl --install Ubuntu

# NOTE: Installing Linux failed, error code: 0x80370114" This could indicate that certain features are not enabled on Windows. To resolve this issue, start PowerShell as an administrator and enable the necessary features using the following two commands:
# dism.exe /online /enable-feature /featurename:Microsoft-Windows-Subsystem-Linux /all /norestart
# dism.exe /online /enable-feature /featurename:VirtualMachinePlatform /all /norestart

# Set installed Ubuntu to default if needed. You could need this if you have multiple distros installed on WSL.
# wsl --set-default Ubuntu

# Open PowerShell and launch Ubuntu using this command, or launch it from the drop-down arrow near the tabs in the PowerShell window. Alternatively, you can also launch it from the Windows Start menu, it should be listed there after it has been installed.
wsl -d ubuntu

# Navigate to your Ubuntu home folder, regardless of your current location, use the command 'cd ~'.
cd ~

# Download Anaconda
wget https://repo.continuum.io/archive/Anaconda3-2022.10-Linux-x86_64.sh

# Install Anaconda
bash Anaconda3-2022.10-Linux-x86_64.sh

# Restart Terminal and start it again
exit

# Clone Stable Diffusion Web UI Repo
git clone https://github.com/AUTOMATIC1111/stable-diffusion-webui.git

# Create conda environment (Run this command in the "stable-diffusion-webui" folder)
conda env create -f environment-wsl2.yaml

# Activate conda environment
conda activate automatic

# Create new repositories folder under stable-diffusion-webui
mkdir repositories

# Clone more repositories
git clone https://github.com/CompVis/stable-diffusion.git repositories/stable-diffusion
git clone https://github.com/CompVis/taming-transformers.git repositories/taming-transformers
git clone https://github.com/sczhou/CodeFormer.git repositories/CodeFormer
git clone https://github.com/salesforce/BLIP.git repositories/BLIP

# Install pip packages
pip install transformers diffusers invisible-watermark --prefer-binary
pip install git+https://github.com/crowsonkb/k-diffusion.git --prefer-binary
pip install git+https://github.com/TencentARC/GFPGAN.git --prefer-binary
pip install -r repositories/CodeFormer/requirements.txt --prefer-binary
pip install -r requirements.txt --prefer-binary
pip install -U numpy --prefer-binary
pip install opencv-python-headless

# Install Cuda
conda install cuda -c nvidia

# Download/copy model file to "stable-diffusion-webui/models/Stable-diffusion" folder

# Add WSL to path
echo 'export LD_LIBRARY_PATH=/usr/lib/wsl/lib:$LD_LIBRARY_PATH' >> ~/.bashrc

# Exit and start Ubuntu terminal again
exit

# To navigate to the "stable-diffusion-webui" directory within your home directory, use this command
cd ~/stable-diffusion-webui

# And always remember to activate Conda environment before launch Stable Diffusion Web UI
conda activate automatic

# Start Web UI
python launch.py
Useful Terminal Commands
# Install WSL in PowerShell
wsl --install Ubuntu

# See a list of the Linux distributions available through the online store
wsl --list --online

# Set default Linux distribution
wsl --set-default Ubuntu

# Uninstall Ubuntu distro
wsl --unregister Ubuntu

# Update all of your packages in Linux
sudo apt update
sudo apt upgrade

# Update all installed packages in the Anaconda automatically without user confirmation.
# NOTE: Please be aware that updating all of your conda packages may cause conflicts and break your stable environment from working.
conda update --all -y

# Initialize Anaconda later
bash ~/anaconda3/condabin/conda init

# Check GPU info
nvidia-smi

# Check if CUDA is installed
nvcc --version

# Check that your library is in /usr/lib/wsl/lib
ldconfig -p | grep cuda

# Check Linux distribution info
cat /etc/os-release

# Open VSCode from WSL
code .

# Eplorer to current location
explorer.exe .

# Remove a directory and its contents regardless if it's empty or not
rm -rf FOLDER_NAME
Possible Errors
Error after run "python launch.py":
ImportError: libGL.so.1: cannot open shared object file: No such file or directory
Fix (source):
pip install opencv-python-headless
Error while trying to generate image:
Could not load library libcudnn_cnn_infer.so.8. Error: libcuda.so: cannot open shared object file: No such file or directory
Please make sure libcudnn_cnn_infer.so.8 is in your library path!
Aborted
Fix (source):
echo 'export LD_LIBRARY_PATH=/usr/lib/wsl/lib:$LD_LIBRARY_PATH' >> ~/.bashrc Installing Linux failed, error code: 0x80370114
When attempting to "wsl --install Ubuntu" from PowerShell, I'm getting an error 0x80370114. To resolve this issue, start PowerShell as an administrator and enable the necessary features using the following commands.
Fix (Source):
dism.exe /online /enable-feature /featurename:Microsoft-Windows-Subsystem-Linux /all /norestart
dism.exe /online /enable-feature /featurename:VirtualMachinePlatform /all /norestartError while trying to generate image:
Could not load library libcudnn_cnn_infer.so.8. Error: libcuda.so: cannot open shared object file: No such file or directory
Please make sure libcudnn_cnn_infer.so.8 is in your library path!
Aborted
Fix (source):
conda install -c anaconda cudnnUseful Links
https://open.substack.com/pub/followfoxai/p/windows-wsl2-installation-sd-automatic1111
https://docs.nvidia.com/cuda/cuda-installation-guide-linux/index.html#conda-installation
https://stackoverflow.com/questions/56470424/nvcc-missing-when-installing-cudatoolkit
https://huggingface.co/CompVis/stable-diffusion-v-1-4-original
https://huggingface.co/stabilityai/stable-diffusion-2-1-base
No comments.