The Turret was a camera tracking and a compositing training project. Camera tracking and Turret itself was made totally in Blender and main compositing I made in After Effects.
Originally this project was for school job a couple months ago. Now I opened it again and decided to made a little breakdown from it. The whole idea was to combine 3D and video footage together. So I just take DSLR camera with me and walk to the nearest gravel field and start video shooting...
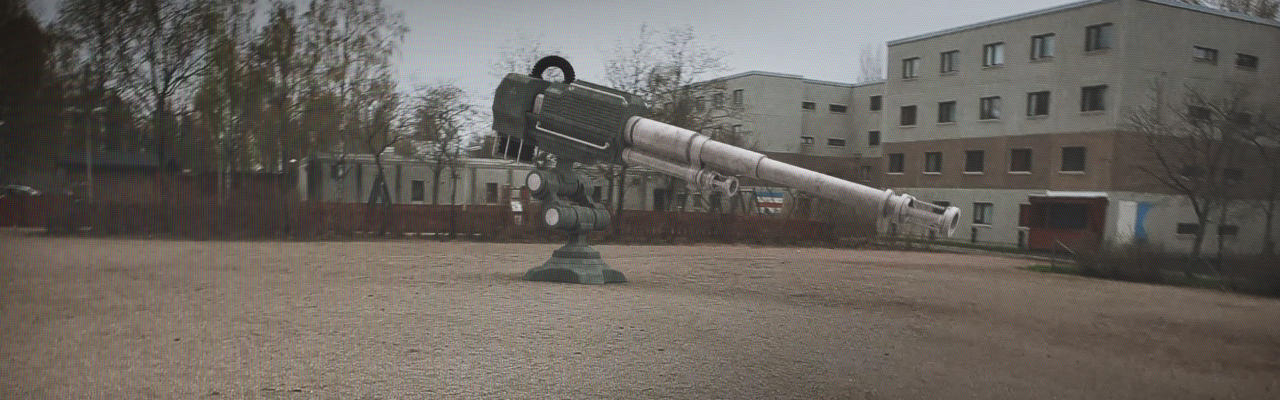
There is only one 3D object, that turret. It's composited with video footage. Video footage was blurry in those fast camera motions and that was hardest part in this case even Blender did own part very well.
![]()
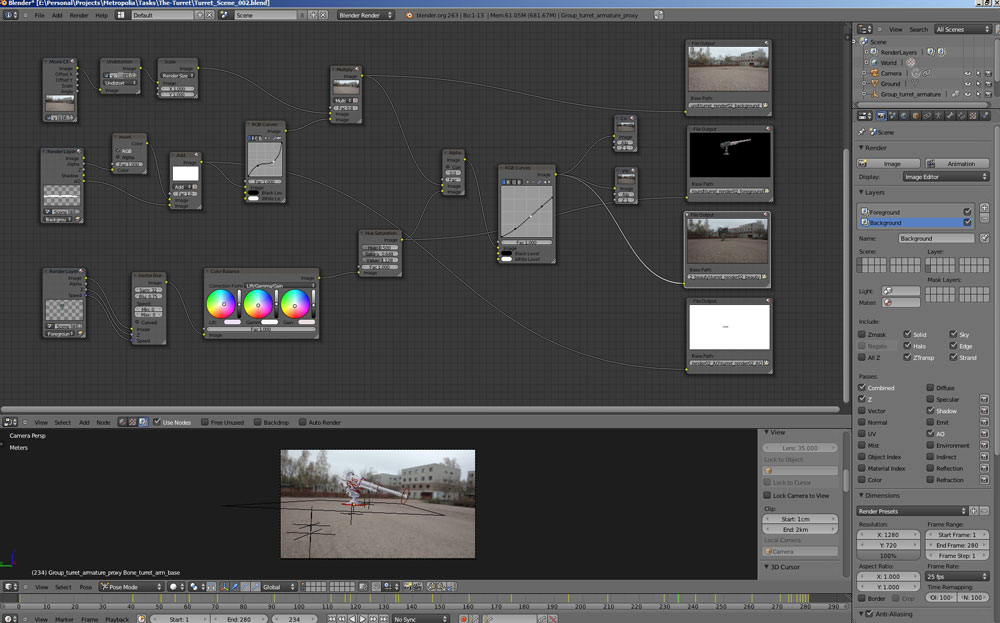
Camera Traking in Blender
This was actually my first experiences with Blender camera traking. I started to learn it with watching this Blender Guru tutorial about Camera Tracking. It is a good place to start learning if you want to know more about this topic and I think Andrew Price is very good teacher.
Camera tracking in blender is very flexible and it works very well. That original video footage have some fast camera moves that was impossible to track without make some handmade tracking, but except these everything was a easy.
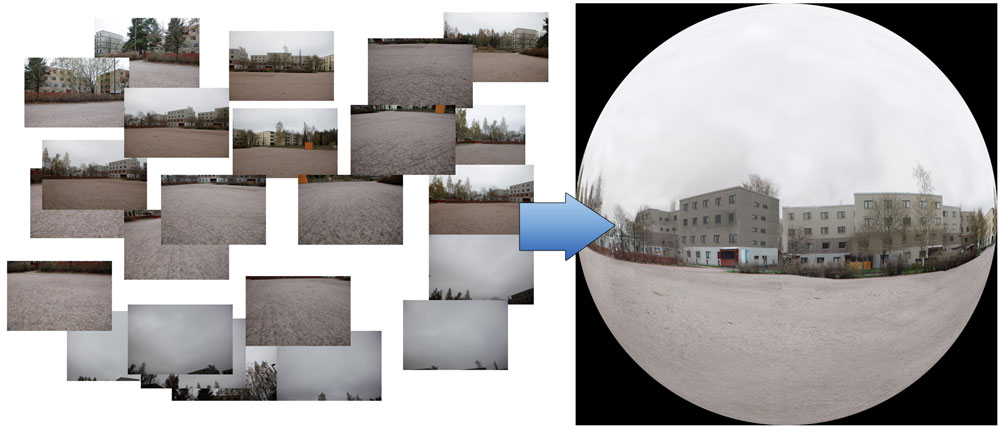
Lightning and Fake Probe
Lightning in this scene was made with "fake light prope" image. I took some photos from that shooting location and combined them in photoshop. Originally light probe needs silver reflection ball, but I do not have any here so I had to get along with regular photos.
Export from Blender to After Effects
After you have done your tracking process and you need to move ahead to compositing or similar phase. You may wonder how exploit your tracking data? Maybe need to export those tracking points to the After Effects? Thank god there is nice solution for that in Blender. Currently builds have export script for this process.
There was a good basic tutorial for "Blender to After Effects exporter" in Vimeo made by Bartek Skorupa.
Compositing
I made some CC (color correction) in blender nodes, but main CC I have done in After Effects. I think even beauty pass from blender looks quite good and it was only with simple node setup.
This beauty pass render was straight from Blender:
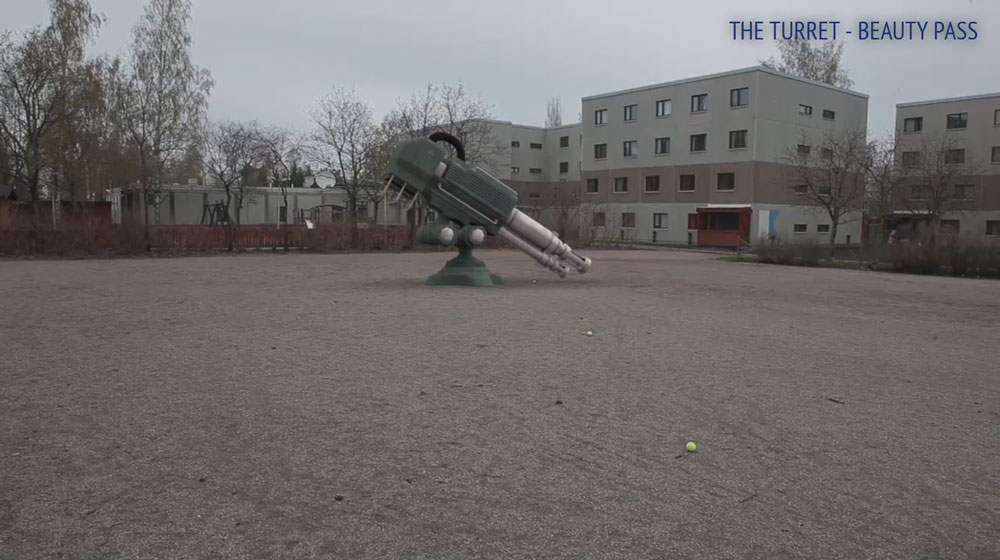
Remove tennis balls
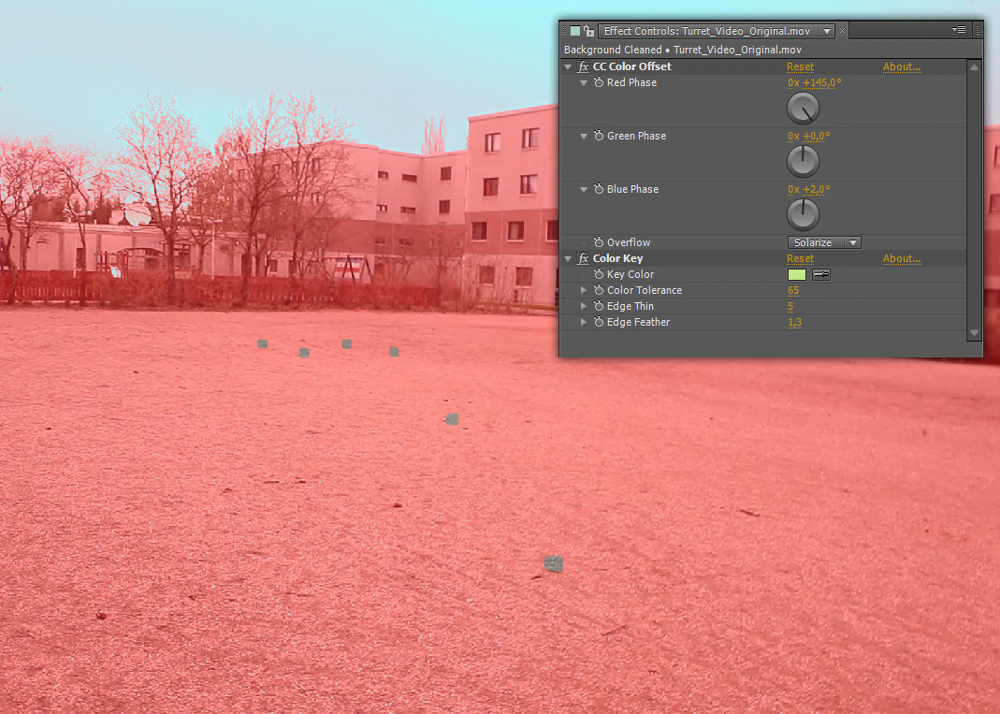
Keying could be problematic in many cases if you need to work with normal video footage and there when is no greenscreen. You need to use masking and adjust colors to get enough good result. It's been a while since I have use After Effects in this kind job. Again, first it takes some time to get the best idea how to keying object out of the image. I tried many different combinations and find that basic keying effect "Color Key" and "CC Color Offset" works fine in this case.
Found new video stock site - Detonation Films
Usually I do not use stock materials, but there is exception with sounds and some effects. This because many licences isn't for commercial usage or there is other limits, so I do them by myself and I sleep my nights well 🙂
There is still good fellows in the world who's give free useful files to use in almost any usage but resale. I found this great company called Detonation Films for a while ago. They make shots that could be hard to do by yourself.
There is plenty free stuff on their page. And if you need more, their prices is quite low. You can use those freebies freely, check their licences here. I use their material on that turret muzzle flare and that ground blow. Many of those footages was in small resolution, but they work fine in this case. They also got new site where is HD resolution video footages to sell. Thanks again Detonation Films these are really useful!
Bad video effect and Color Correction
After I was done with all basic CC stuff I want to make a little bit brutal look to video. I try to simulate more grainy video like in the documentaries and get away from that original clean "DSLR HD" format look. I think it's better with this way in this topic. I made also some video "grain stripes" to the end of the film.
Sounds
Sounds is combined with freesound.org (the best Creative Commons Licensed sound library) sounds and some own recorded sound. Theme song is montly free file from http://audiojungle.net.
All sound compositing was done in Reaper. I think Reaper is very good for this kind projects, because it can handle video files and you really need that option if you want to sync your audio.
Tip: If you need better video formats support to Reaper, check this webpage.
Sound Attribution List
This video uses these sounds from freesound:
S: caja1.wav by suzenako
S: caja2.wav by suzenako
S: caja_rrec.wav by suzenako
S: hydraul1.wav by swelk
S: airlock_extended.wav by primeval_polypod
S: hydraulic_1.wav by Ferdinger
S: servo_truck_open_01.wav by m_O_m
S: Footsteps.wav by HerbertBoland
S: possiblelazer.wav by aust_paul
S: rocketexpl.wav by nthompson
S: storing mix.wav by damco
S: Noise 1.wav by KatHakaku
S: Dronetail 04.wav by Jovica
S: MemoryMoon_pad-luminize.wav by suonho
S: whoosh.wav by Benboncan
Theme song is montly free file from http://audiojungle.net
Fight For Freedoms (SB).wav
Again, thanks to all!
Ps. I shared my own record "gravel field walking" clips to freesound.org with zero licences.
Overview
This project was very funny and I made it because I wanted to learn how to combine 3D-model and video material together using Blender and After Effects. I learned so much and hope it's comes handy in the future. I also hope that there was something new or just inpiring stuff for you. Thanks for reading!
Thanks for your comments, it’s really helps me with my inspiration 😉
WOW! This was awesome.
Thanks for the sharing. This was good breakdown.
This is awesome. Watching this inspired me a lot! Thanks for sharing…